> ## Documentation Index
> Fetch the complete documentation index at: https://docs.cernel.com/llms.txt
> Use this file to discover all available pages before exploring further.
# Connecting Shopify
> Connect your Shopify store to Cernel for two-way product sync in minutes.
Cernel integrates directly with Shopify to pull your product catalog in and push enriched content back, including metafields. Once connected, your products sync automatically so your AI-generated content flows straight to your store.
## How it works
The Shopify integration creates a two-way connection between your store and Cernel. When you connect, Cernel imports your full product catalog (names, images, variants, and existing descriptions). After you enrich products with AI-generated content, you can sync the results back to Shopify as product fields or custom metafields.
### Why you would use this
Your products flow directly from Shopify into Cernel. No CSV exports, no copy-paste, no data gaps.
AI-generated descriptions, meta titles, and attribute values sync back to Shopify, including custom metafields for structured data your theme can display.
**Before you start:** You'll need admin access to your Shopify store and a Cernel account. The connection uses Shopify's official OAuth flow, so there are no API keys to manage manually.
The integration adopts your store's languages when it connects, and its default language is the store's default language (see **Settings > Languages** in your Shopify admin). Create your Cernel organization with the same primary language as the store's default; Cernel warns you when the two differ.
## Step-by-step guide
In Cernel, go to **Settings** in the sidebar, then select **Organization > Integrations**.
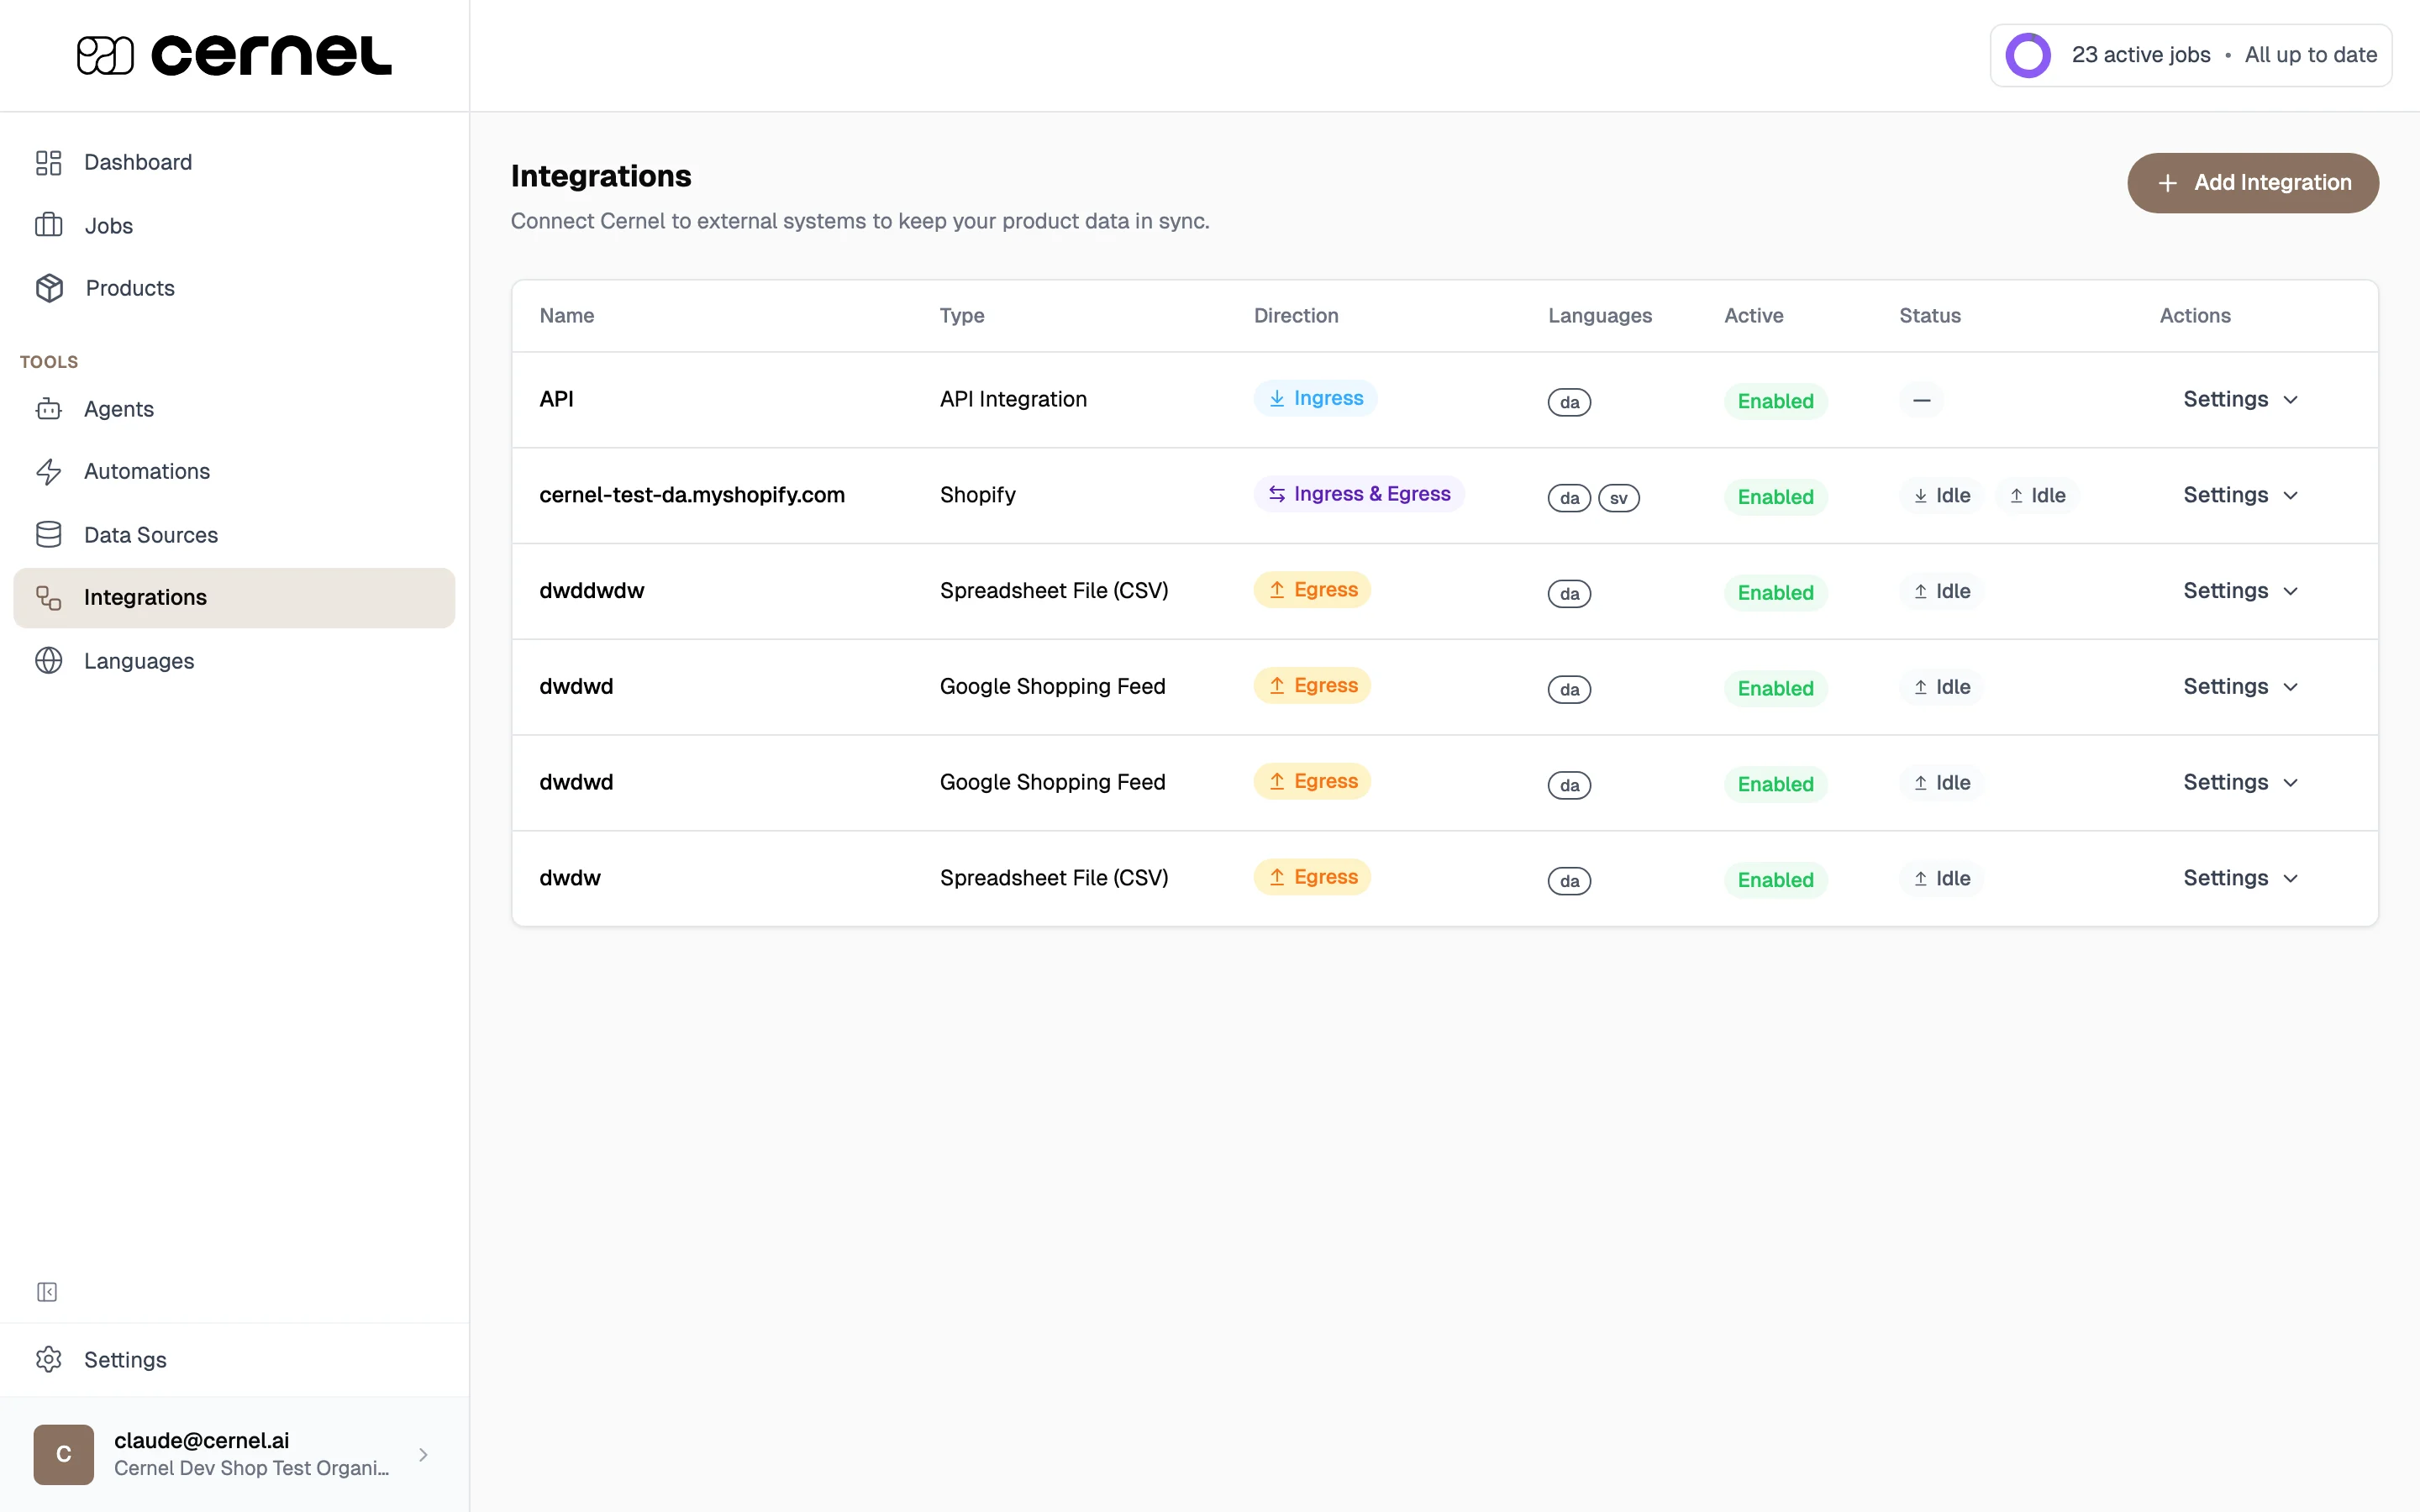 Click **Add Integration**. In the integration selection modal, choose **Shopify**.
Enter your Shopify store domain (e.g., `your-store.myshopify.com`). Click **Connect** to begin the OAuth authorization flow.
Your domain is the `.myshopify.com` address, not your custom domain. You can find it in Shopify under **Settings > Domains**.
You'll be redirected to Shopify to authorize Cernel. Review the requested permissions and click **Install app**.
After authorizing, Cernel begins importing your products. You'll see a progress indicator showing the sync status. This may take a few minutes depending on your catalog size.
You've successfully connected your Shopify store. Once the sync completes, your products will appear in the Cernel **Catalog** and you can start enriching them with AI.
## Advanced configuration
After connecting, you can map Cernel attributes to Shopify product fields. Navigate to **Tools > Integrations**, click on your Shopify connection, and open **Property Mapping**.
The mapping interface shows your Cernel attributes on the left and available Shopify fields on the right. Draw connections between them to define how enriched content flows back to your store.
For structured data that doesn't map to standard Shopify fields (like materials or size guides), you can sync attributes as Shopify metafields. When configuring an attribute, enable **Sync to Shopify Metafields** and select the metafield namespace and key.
You don't need to pre-create the metafield definition in Shopify. If the namespace and key don't exist yet, Cernel creates the metafield definition in your Shopify store automatically when you set up the mapping. If a definition with that namespace and key already exists, Cernel uses it.
Metafields are useful for data your Shopify theme can render dynamically, like displaying material lists or care instructions on product pages.
You can configure how Cernel handles sync conflicts and update behavior under **Sync behavior configuration** in the integration settings. Options include choosing a sync mode that controls whether Cernel overwrites existing Shopify data or only fills in empty fields.
Changes synced to Shopify are live. Always use the **Review & Approve** workflow in Cernel before pushing enriched content to your store.
## Frequently asked questions
It depends on your catalog size. A store with a few hundred products typically imports in under a minute. Larger catalogs with thousands of products may take several minutes. You can close the modal and products will continue importing in the background.
First, check the integration status under **Tools > Integrations**. If the status shows the sync is still running, wait for it to complete. If the sync failed, try disconnecting and reconnecting the integration. Make sure you authorized all requested permissions in Shopify.
Yes. Go to **Tools > Integrations** and click **Add Integration** again to connect additional stores. Each store connection is managed independently.
Cernel requests read and write access to your product catalog, including product data, images, and metafields. These permissions are required for the two-way sync to work. Cernel does not access customer data, orders, or payment information.
Yes. Go to **Tools > Integrations**, find your Shopify connection, and remove it. Syncing stops, and no data is ever deleted from your Shopify store.
The removal dialog includes a **Delete imported products** option that is **on by default**: leaving it on permanently deletes the products imported through that integration from your Cernel catalog. Turn it off if you want to keep them, or simply disable the integration instead of removing it to stop syncing without touching your catalog. See [Removing an integration](/integrations/shopify) for details.
## What's next
See how Cernel automatically classifies your imported products into categories, and where to configure the attributes and agents that run on each branch of the tree.
Set up AI agents to generate descriptions, meta content, and structured attributes for your products.
Click **Add Integration**. In the integration selection modal, choose **Shopify**.
Enter your Shopify store domain (e.g., `your-store.myshopify.com`). Click **Connect** to begin the OAuth authorization flow.
Your domain is the `.myshopify.com` address, not your custom domain. You can find it in Shopify under **Settings > Domains**.
You'll be redirected to Shopify to authorize Cernel. Review the requested permissions and click **Install app**.
After authorizing, Cernel begins importing your products. You'll see a progress indicator showing the sync status. This may take a few minutes depending on your catalog size.
You've successfully connected your Shopify store. Once the sync completes, your products will appear in the Cernel **Catalog** and you can start enriching them with AI.
## Advanced configuration
After connecting, you can map Cernel attributes to Shopify product fields. Navigate to **Tools > Integrations**, click on your Shopify connection, and open **Property Mapping**.
The mapping interface shows your Cernel attributes on the left and available Shopify fields on the right. Draw connections between them to define how enriched content flows back to your store.
For structured data that doesn't map to standard Shopify fields (like materials or size guides), you can sync attributes as Shopify metafields. When configuring an attribute, enable **Sync to Shopify Metafields** and select the metafield namespace and key.
You don't need to pre-create the metafield definition in Shopify. If the namespace and key don't exist yet, Cernel creates the metafield definition in your Shopify store automatically when you set up the mapping. If a definition with that namespace and key already exists, Cernel uses it.
Metafields are useful for data your Shopify theme can render dynamically, like displaying material lists or care instructions on product pages.
You can configure how Cernel handles sync conflicts and update behavior under **Sync behavior configuration** in the integration settings. Options include choosing a sync mode that controls whether Cernel overwrites existing Shopify data or only fills in empty fields.
Changes synced to Shopify are live. Always use the **Review & Approve** workflow in Cernel before pushing enriched content to your store.
## Frequently asked questions
It depends on your catalog size. A store with a few hundred products typically imports in under a minute. Larger catalogs with thousands of products may take several minutes. You can close the modal and products will continue importing in the background.
First, check the integration status under **Tools > Integrations**. If the status shows the sync is still running, wait for it to complete. If the sync failed, try disconnecting and reconnecting the integration. Make sure you authorized all requested permissions in Shopify.
Yes. Go to **Tools > Integrations** and click **Add Integration** again to connect additional stores. Each store connection is managed independently.
Cernel requests read and write access to your product catalog, including product data, images, and metafields. These permissions are required for the two-way sync to work. Cernel does not access customer data, orders, or payment information.
Yes. Go to **Tools > Integrations**, find your Shopify connection, and remove it. Syncing stops, and no data is ever deleted from your Shopify store.
The removal dialog includes a **Delete imported products** option that is **on by default**: leaving it on permanently deletes the products imported through that integration from your Cernel catalog. Turn it off if you want to keep them, or simply disable the integration instead of removing it to stop syncing without touching your catalog. See [Removing an integration](/integrations/shopify) for details.
## What's next
See how Cernel automatically classifies your imported products into categories, and where to configure the attributes and agents that run on each branch of the tree.
Set up AI agents to generate descriptions, meta content, and structured attributes for your products.