

How it works
Under Settings > Developer > API, you authenticate requests to the Public API with keys, organized into service accounts, one per integration. Push products in, let automations enrich them, then poll the changes endpoint to pull the results back.Why you would use this
Automate product syncing
Push products from your ERP, PIM, or custom backend into Cernel without manual imports.
Pull enriched content back
Poll the changes endpoint to pull AI-generated content and product updates back into your own systems on your schedule.
Step-by-step guide
Managing API keys with service accounts
An API key authenticates requests to the Public API. Keys are organized into service accounts: one account per integration, each holding its own keys. Grouping keys this way lets you see which integration has been calling and switch one off without disturbing the others.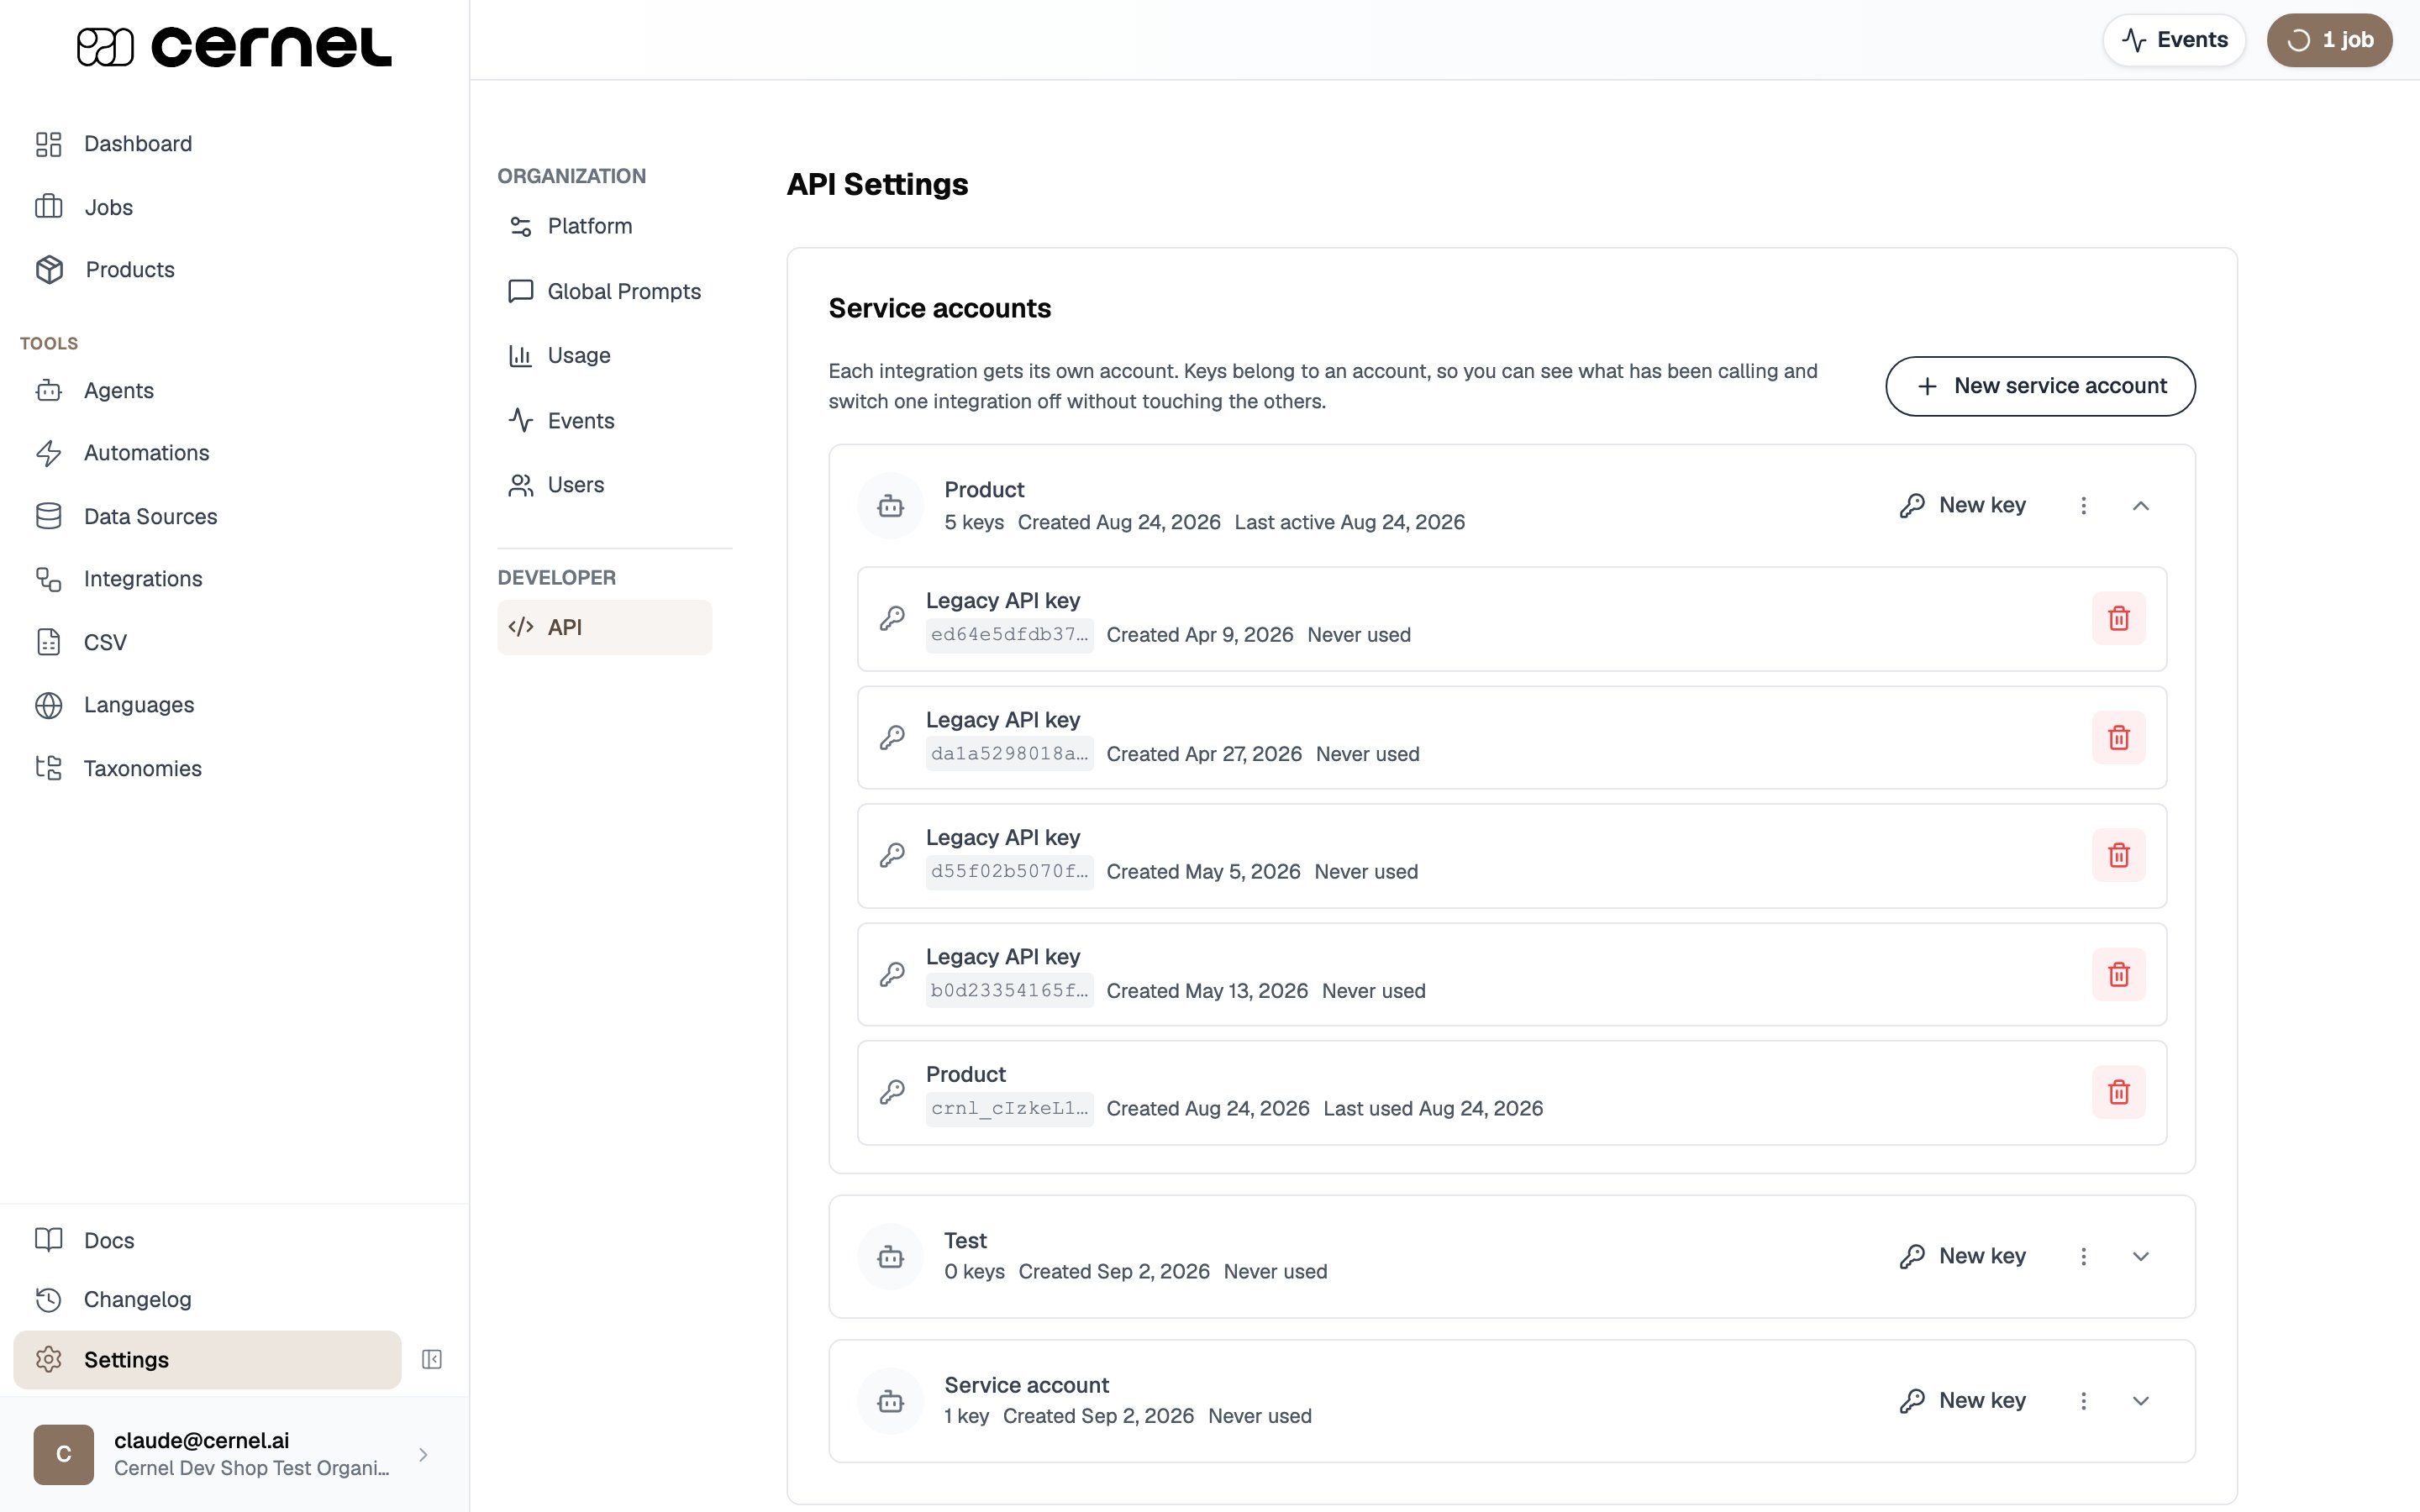
The API settings page, organized around service accounts
1
Open API settings
Go to Settings > Developer > API. Each service account is listed with the number of keys it holds, when it was created, and when it was last used. Expand an account to see its individual keys.
2
Create a service account
Click New service account and name it after the integration that will use it, for example
Shopify or ERP sync. That name is what shows up on the work its keys do. Creating an account immediately mints its first key.3
Copy the new key
When a key is created, Cernel shows it once in a Your new API key dialog. Copy it and store it somewhere safe. For your security you won’t be able to see the full key again, only a masked version.
4
Add or rotate keys
Click New key on an account to mint another key for it. To roll over to a fresh key without downtime, add the new key, update your integration to use it, then revoke the old one. Revoking a key stops it working immediately while the account and its other keys keep going. A revoked key stays in the list, marked Revoked, so a past call still has an explanation.
5
Rename or delete an account
Renaming and deleting a service account are admin-only; minting a key stays open to any member. You can delete an account only once none of its keys are still live, so revoke its keys first.
6
View API documentation
Click Visit Documentation to open the full API reference in a new tab, with every endpoint, request format, and response schema.
Keys created before service accounts existed appear under a Keys without an account list at the bottom of the page. There’s nothing to do there: the next time such a key is used, it gets an account of its own and moves up to the main list. Revoke any you no longer need.
Getting enriched content back
Cernel does not push results to your systems. Once automations have enriched your products, poll the changes endpoint to pull the updates back in chronological order, using the offset it returns to pick up where you left off on the next poll. See Building a custom product pipeline for the full walkthrough.Frequently asked questions
Where do I find my API key?
Where do I find my API key?
Go to Settings > Developer > API, where keys are grouped under service accounts. Cernel shows a key’s full value only once, in a dialog right after it’s created, so copy it then. Afterwards only a masked version is shown. If you’ve lost a key, mint a new one on its account and revoke the old one.
Can I have multiple API keys?
Can I have multiple API keys?
Yes. Create a service account per integration, and give each account as many keys as you need. Keys are revoked individually, so you can rotate one key or switch off a single integration without affecting the others. This is a change from the earlier model of one key per organization.
How do I rotate an API key without downtime?
How do I rotate an API key without downtime?
Mint a new key on the same service account with New key, update your integration to use it, then revoke the old key. Because both keys are live during the switch, nothing stops working in between. Revoking takes effect immediately, so revoke only after the new key is in place.
How do I get enriched content back out of Cernel?
How do I get enriched content back out of Cernel?
Poll the changes endpoint on the Public API. It returns enrichment updates in chronological order, and you use the offset it returns to fetch only what changed since your last poll. There is no push-style webhook delivery, so retrieving results is always a poll from your side.
What’s next
Public API
Set up a full API integration for pushing products programmatically.
Automations
Auto-enrich products pushed via API with automations.