Automatically enrich products as they arrive or change - no manual intervention required.
Automations let you set up rules that automatically enrich products as they’re created or updated. Pick a taxonomy and category, choose which attributes to generate, optionally narrow with filters, and Cernel handles the rest. Every product that matches your rule is enriched without anyone lifting a finger.
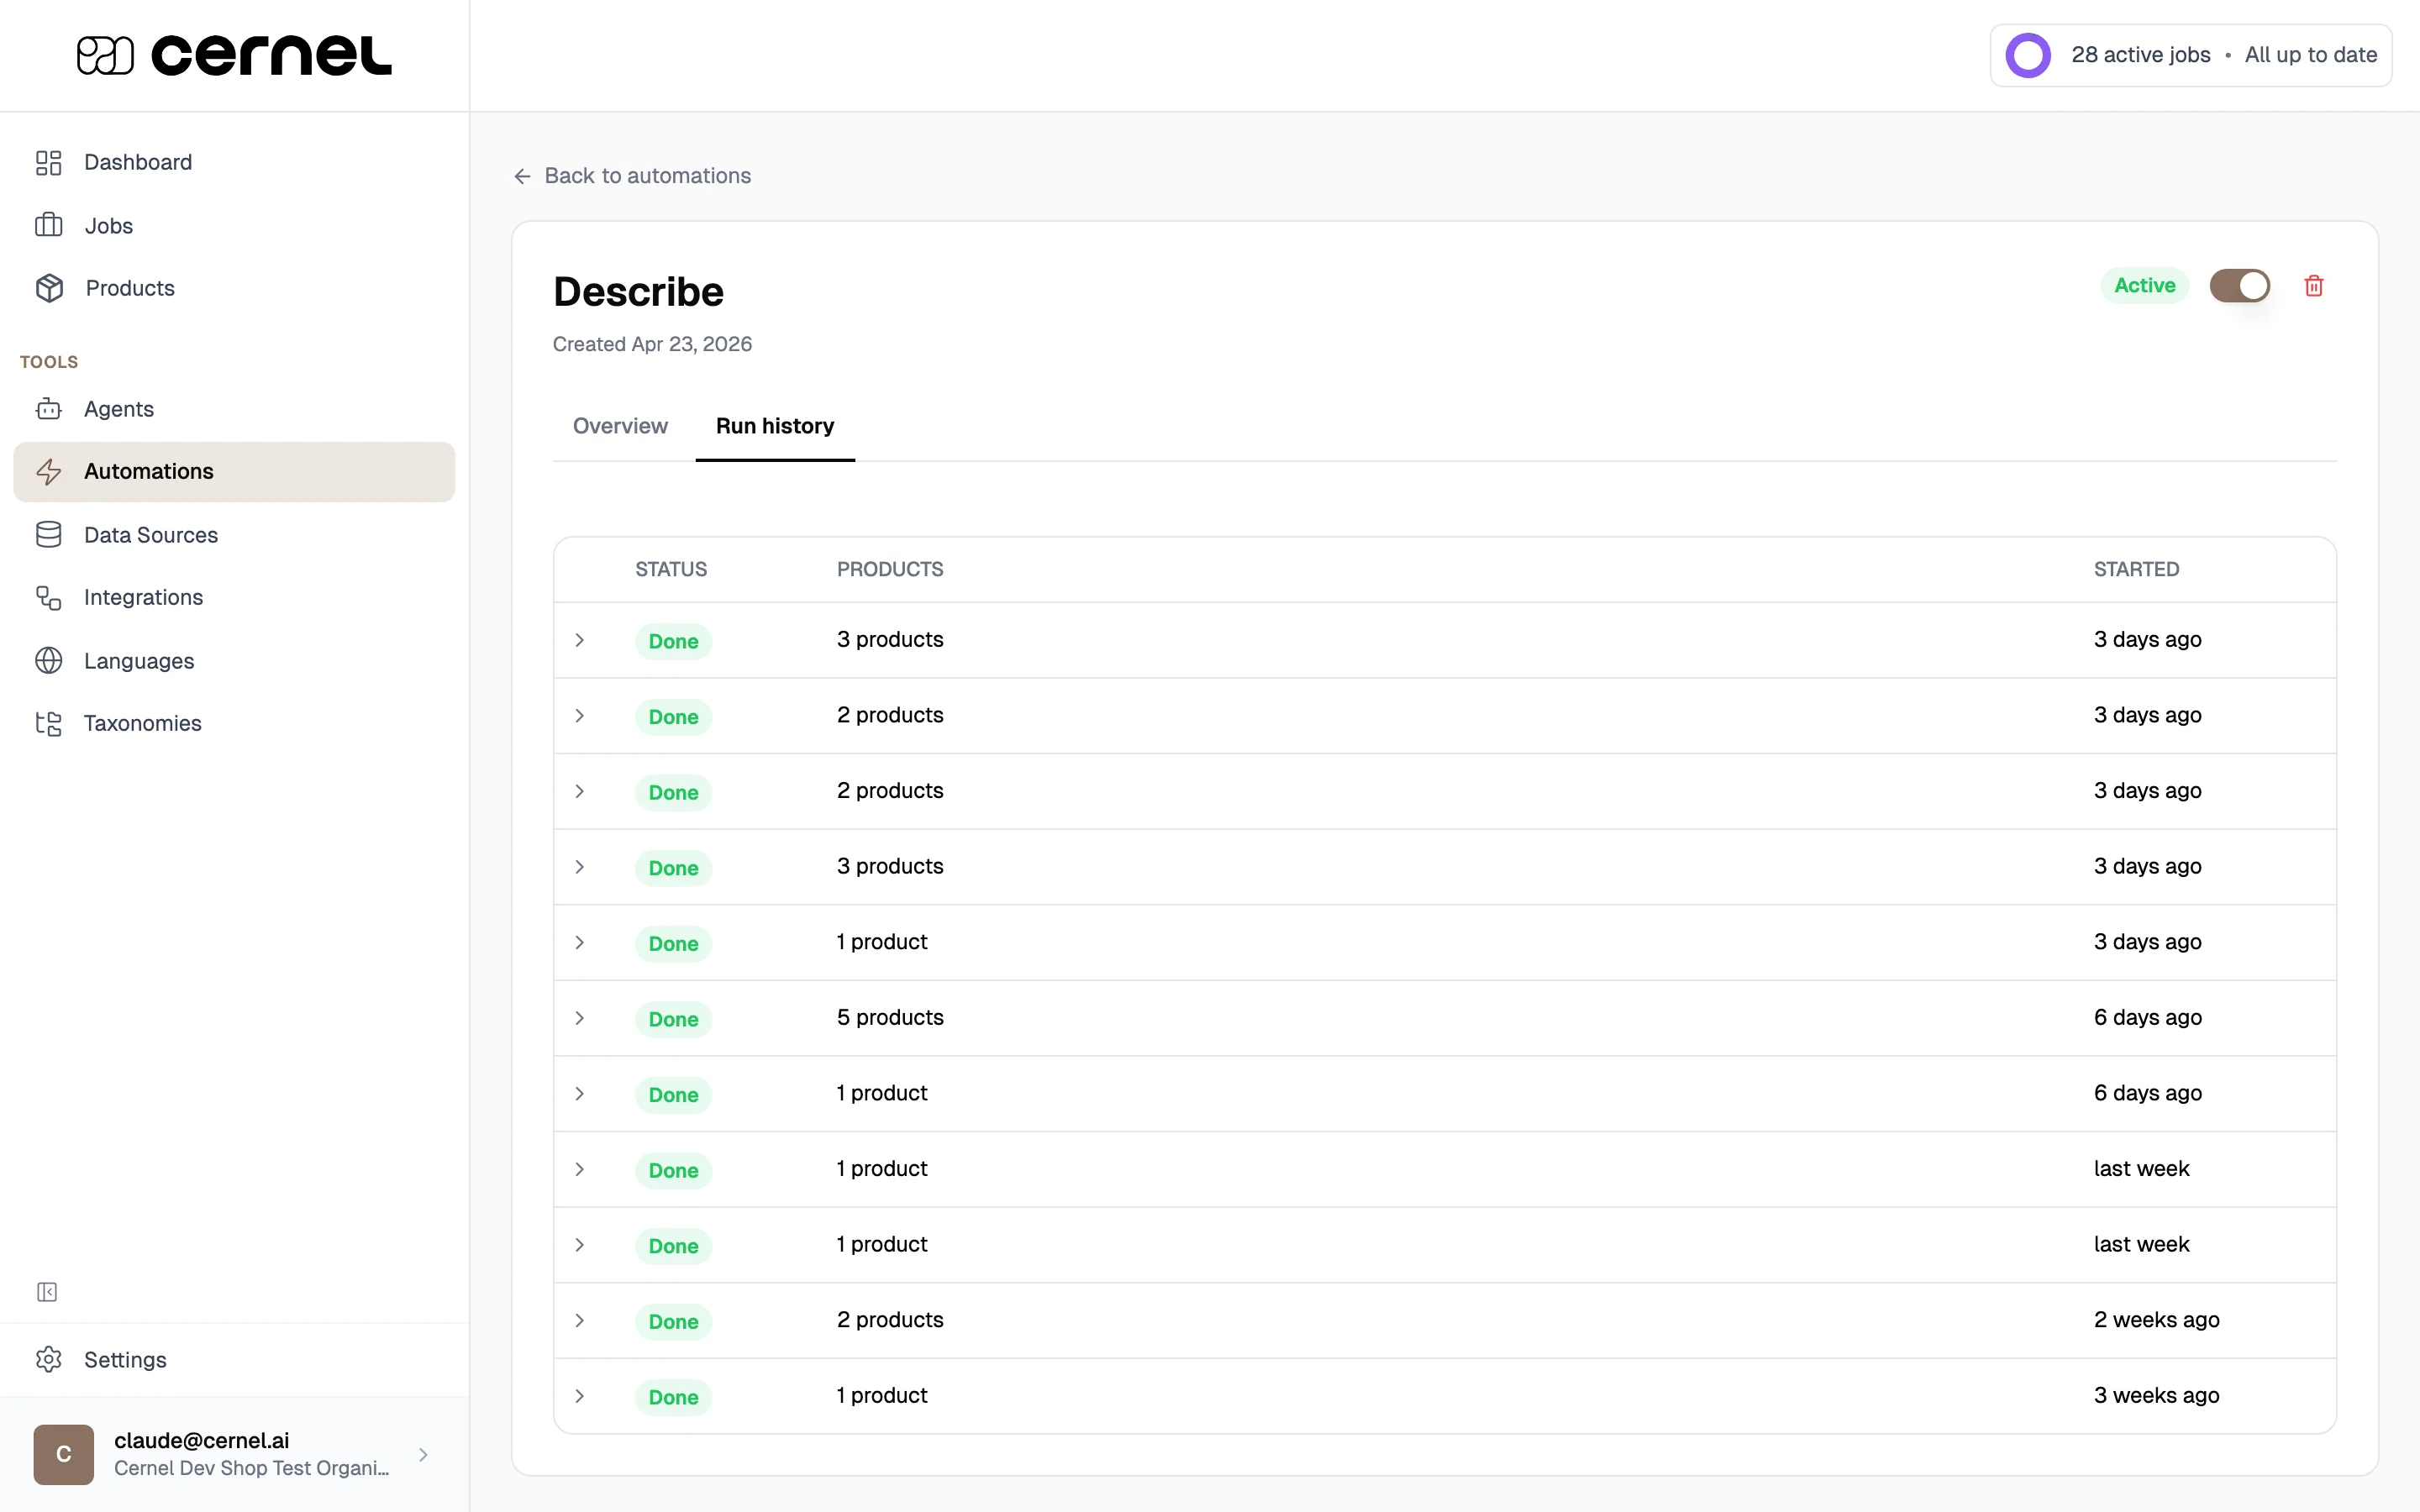
An automation watches for products in a specific taxonomy and category. When a product arrives or changes in a way that matches your conditions, Cernel automatically runs enrichment using the agents linked to the attributes you selected. The results appear as jobs you can review from the Dashboard and on the automation’s Run history tab.You configure automations by completing a one-page sentence builder: three lines that read as a single sentence and let you fill in each slot from the same screen.
Products get descriptions, meta titles, and structured attributes the moment they arrive or change. No one has to remember to trigger enrichment.
Consistent coverage across your catalog
Every product that matches your rules gets the same treatment. No products slip through without content.
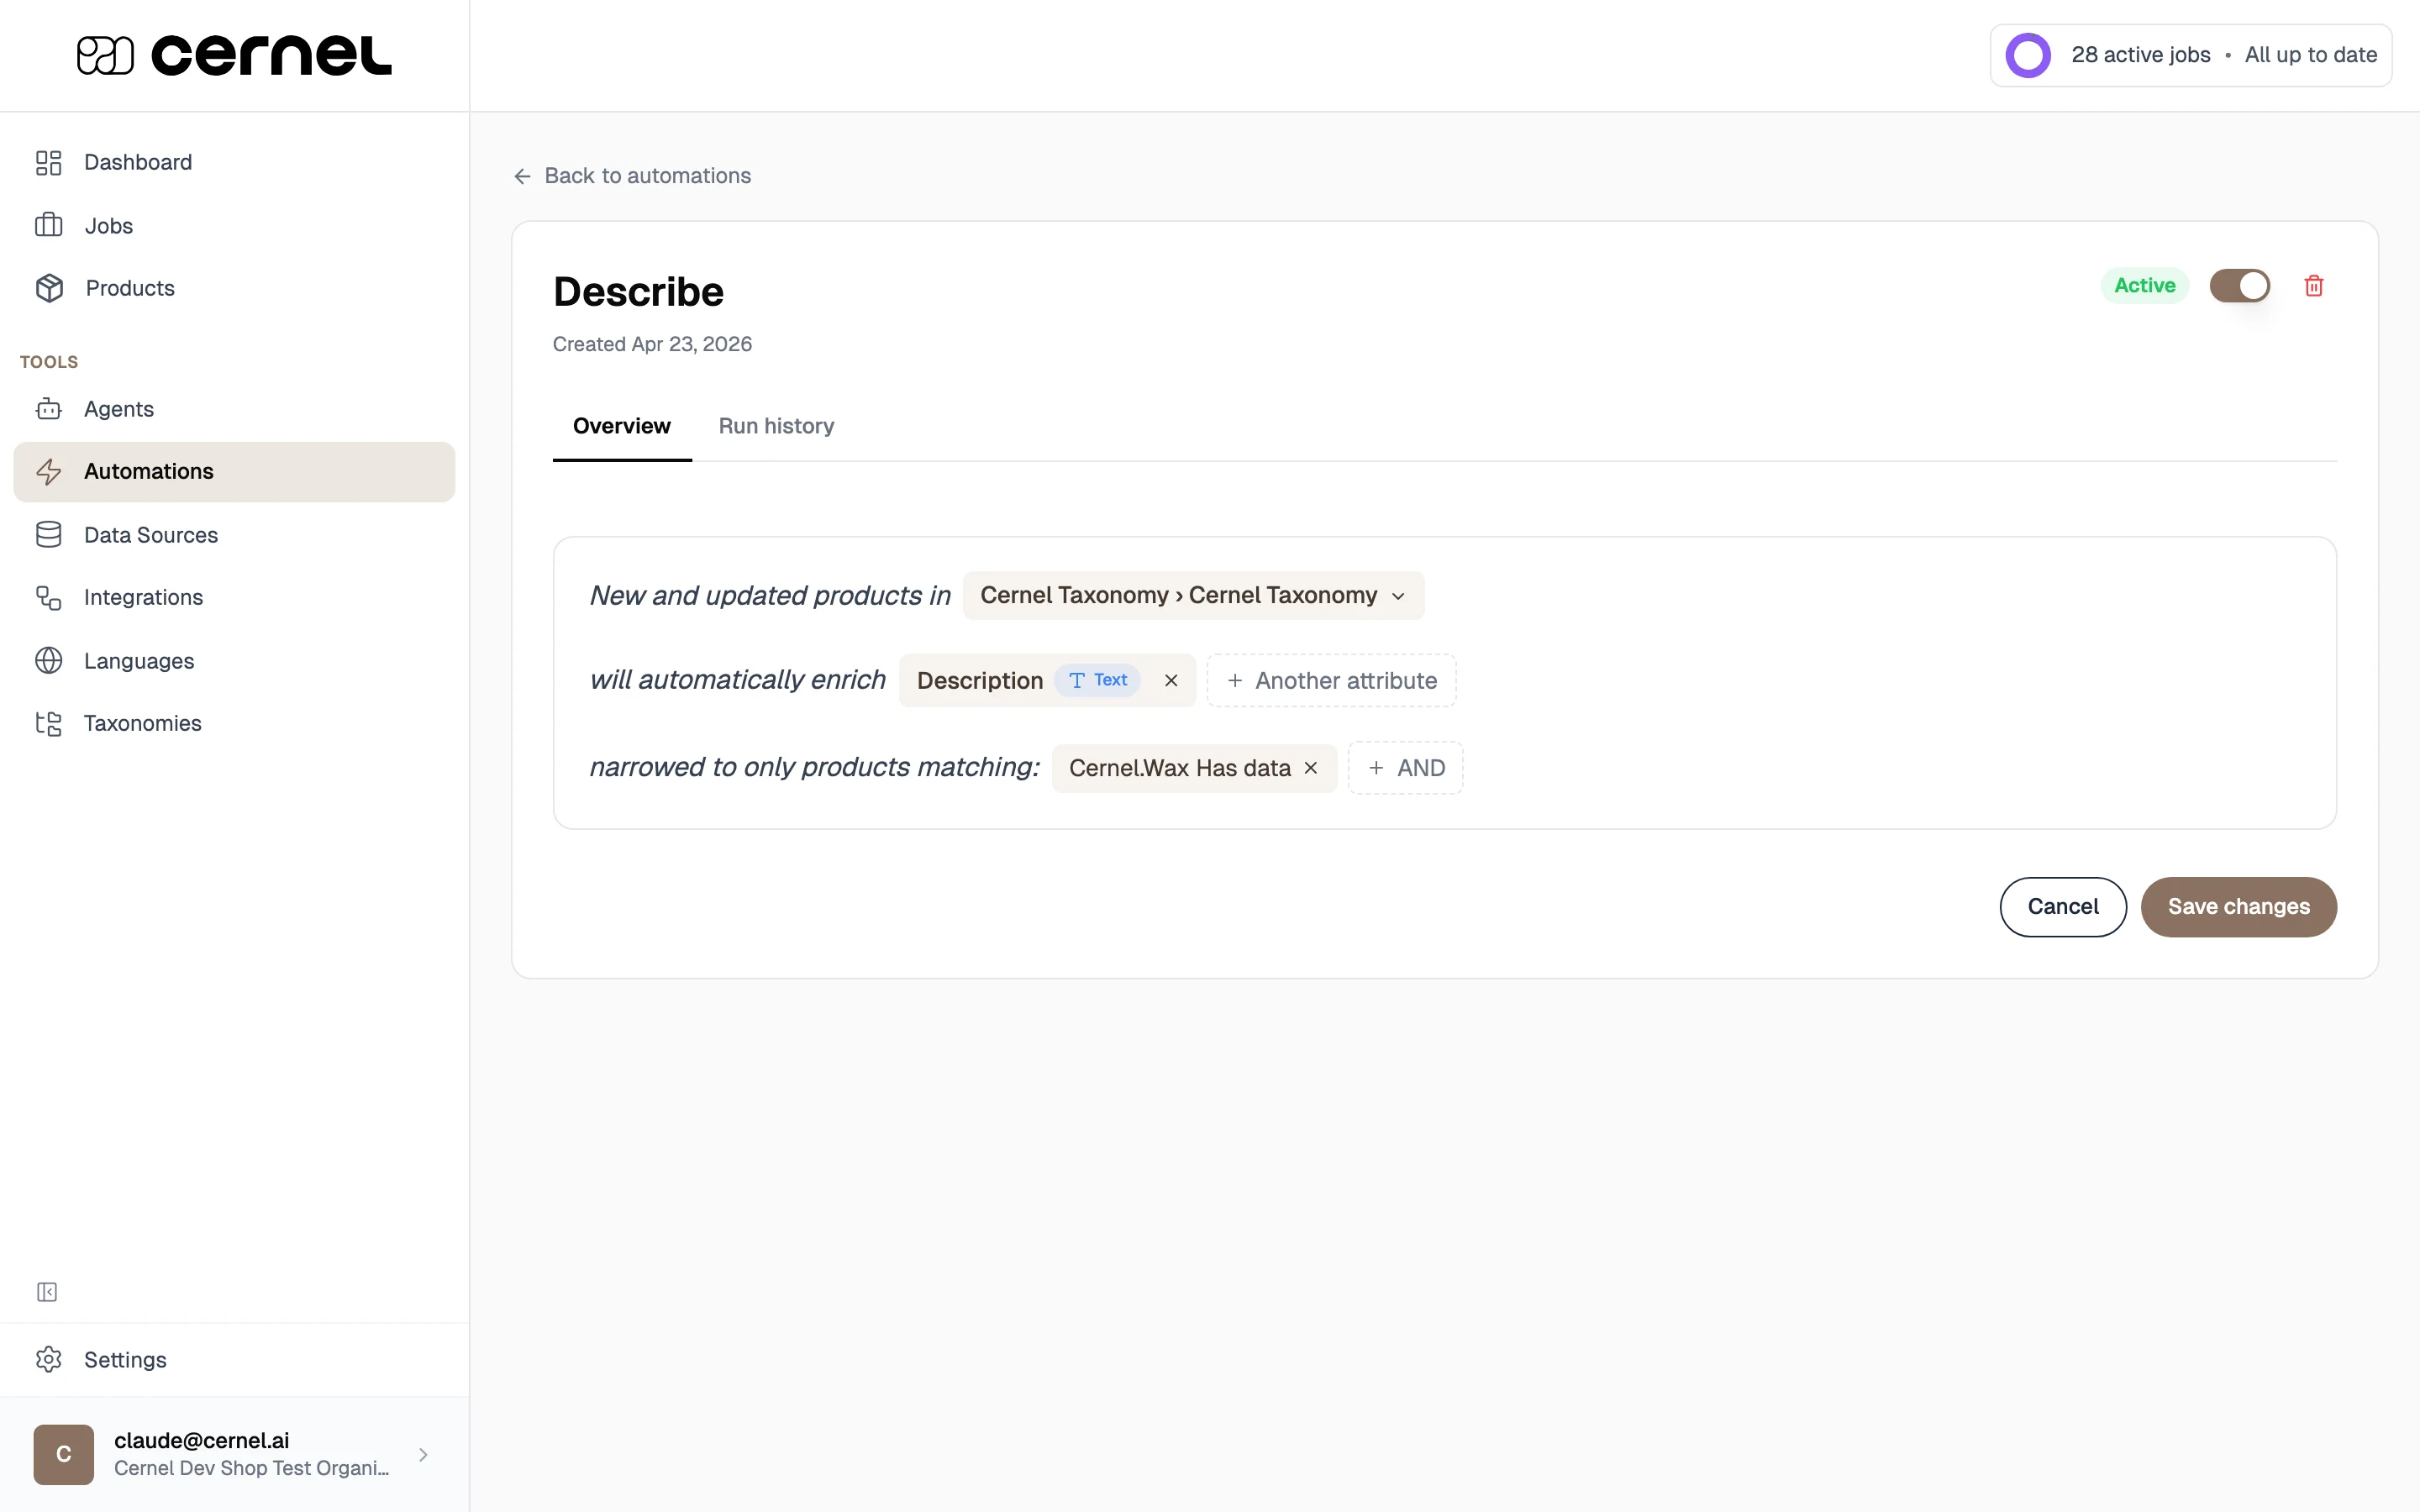
Key concept: the automation sentence. Each automation reads as one editable sentence: “New and updated products in [taxonomy › category] will automatically enrich [attributes] narrowed to only products matching [filters]”. Click any slot to change it; the rest of the sentence updates around your choice.
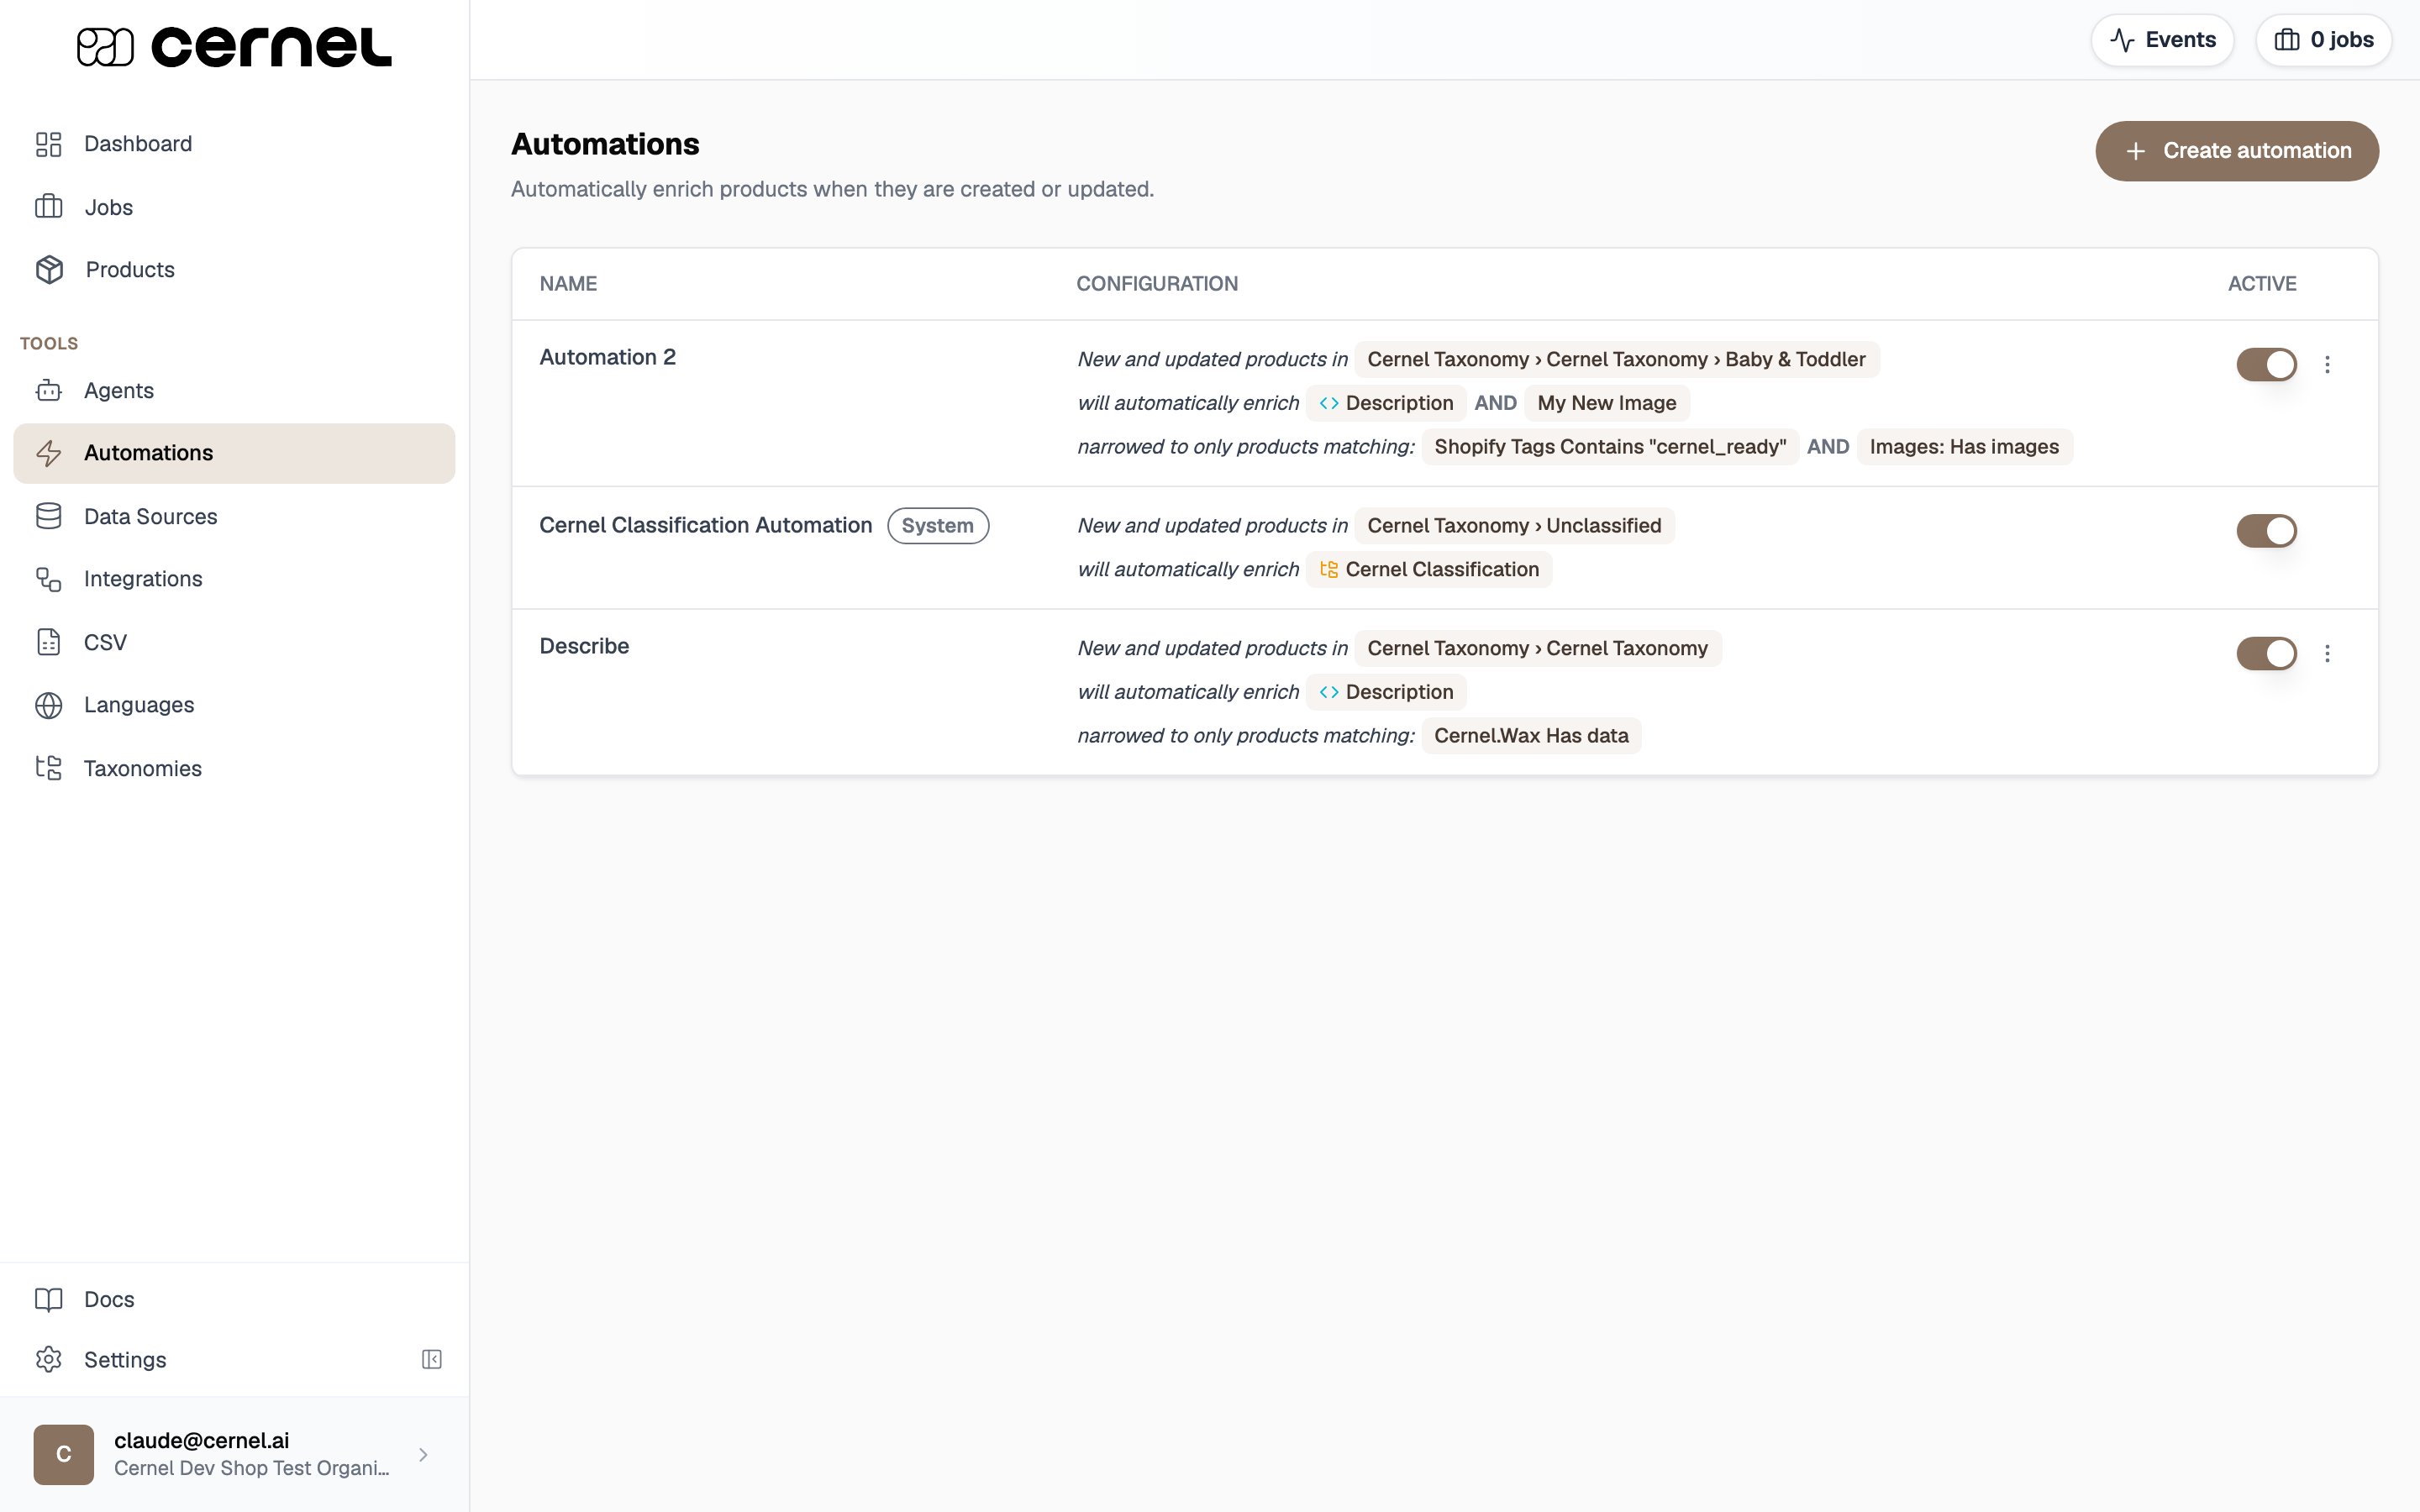
Go to Tools > Automations in the sidebar. You’ll see a list of existing automations, each shown as a compact sentence summary so you can scan the configuration at a glance.
2
Click Create automation
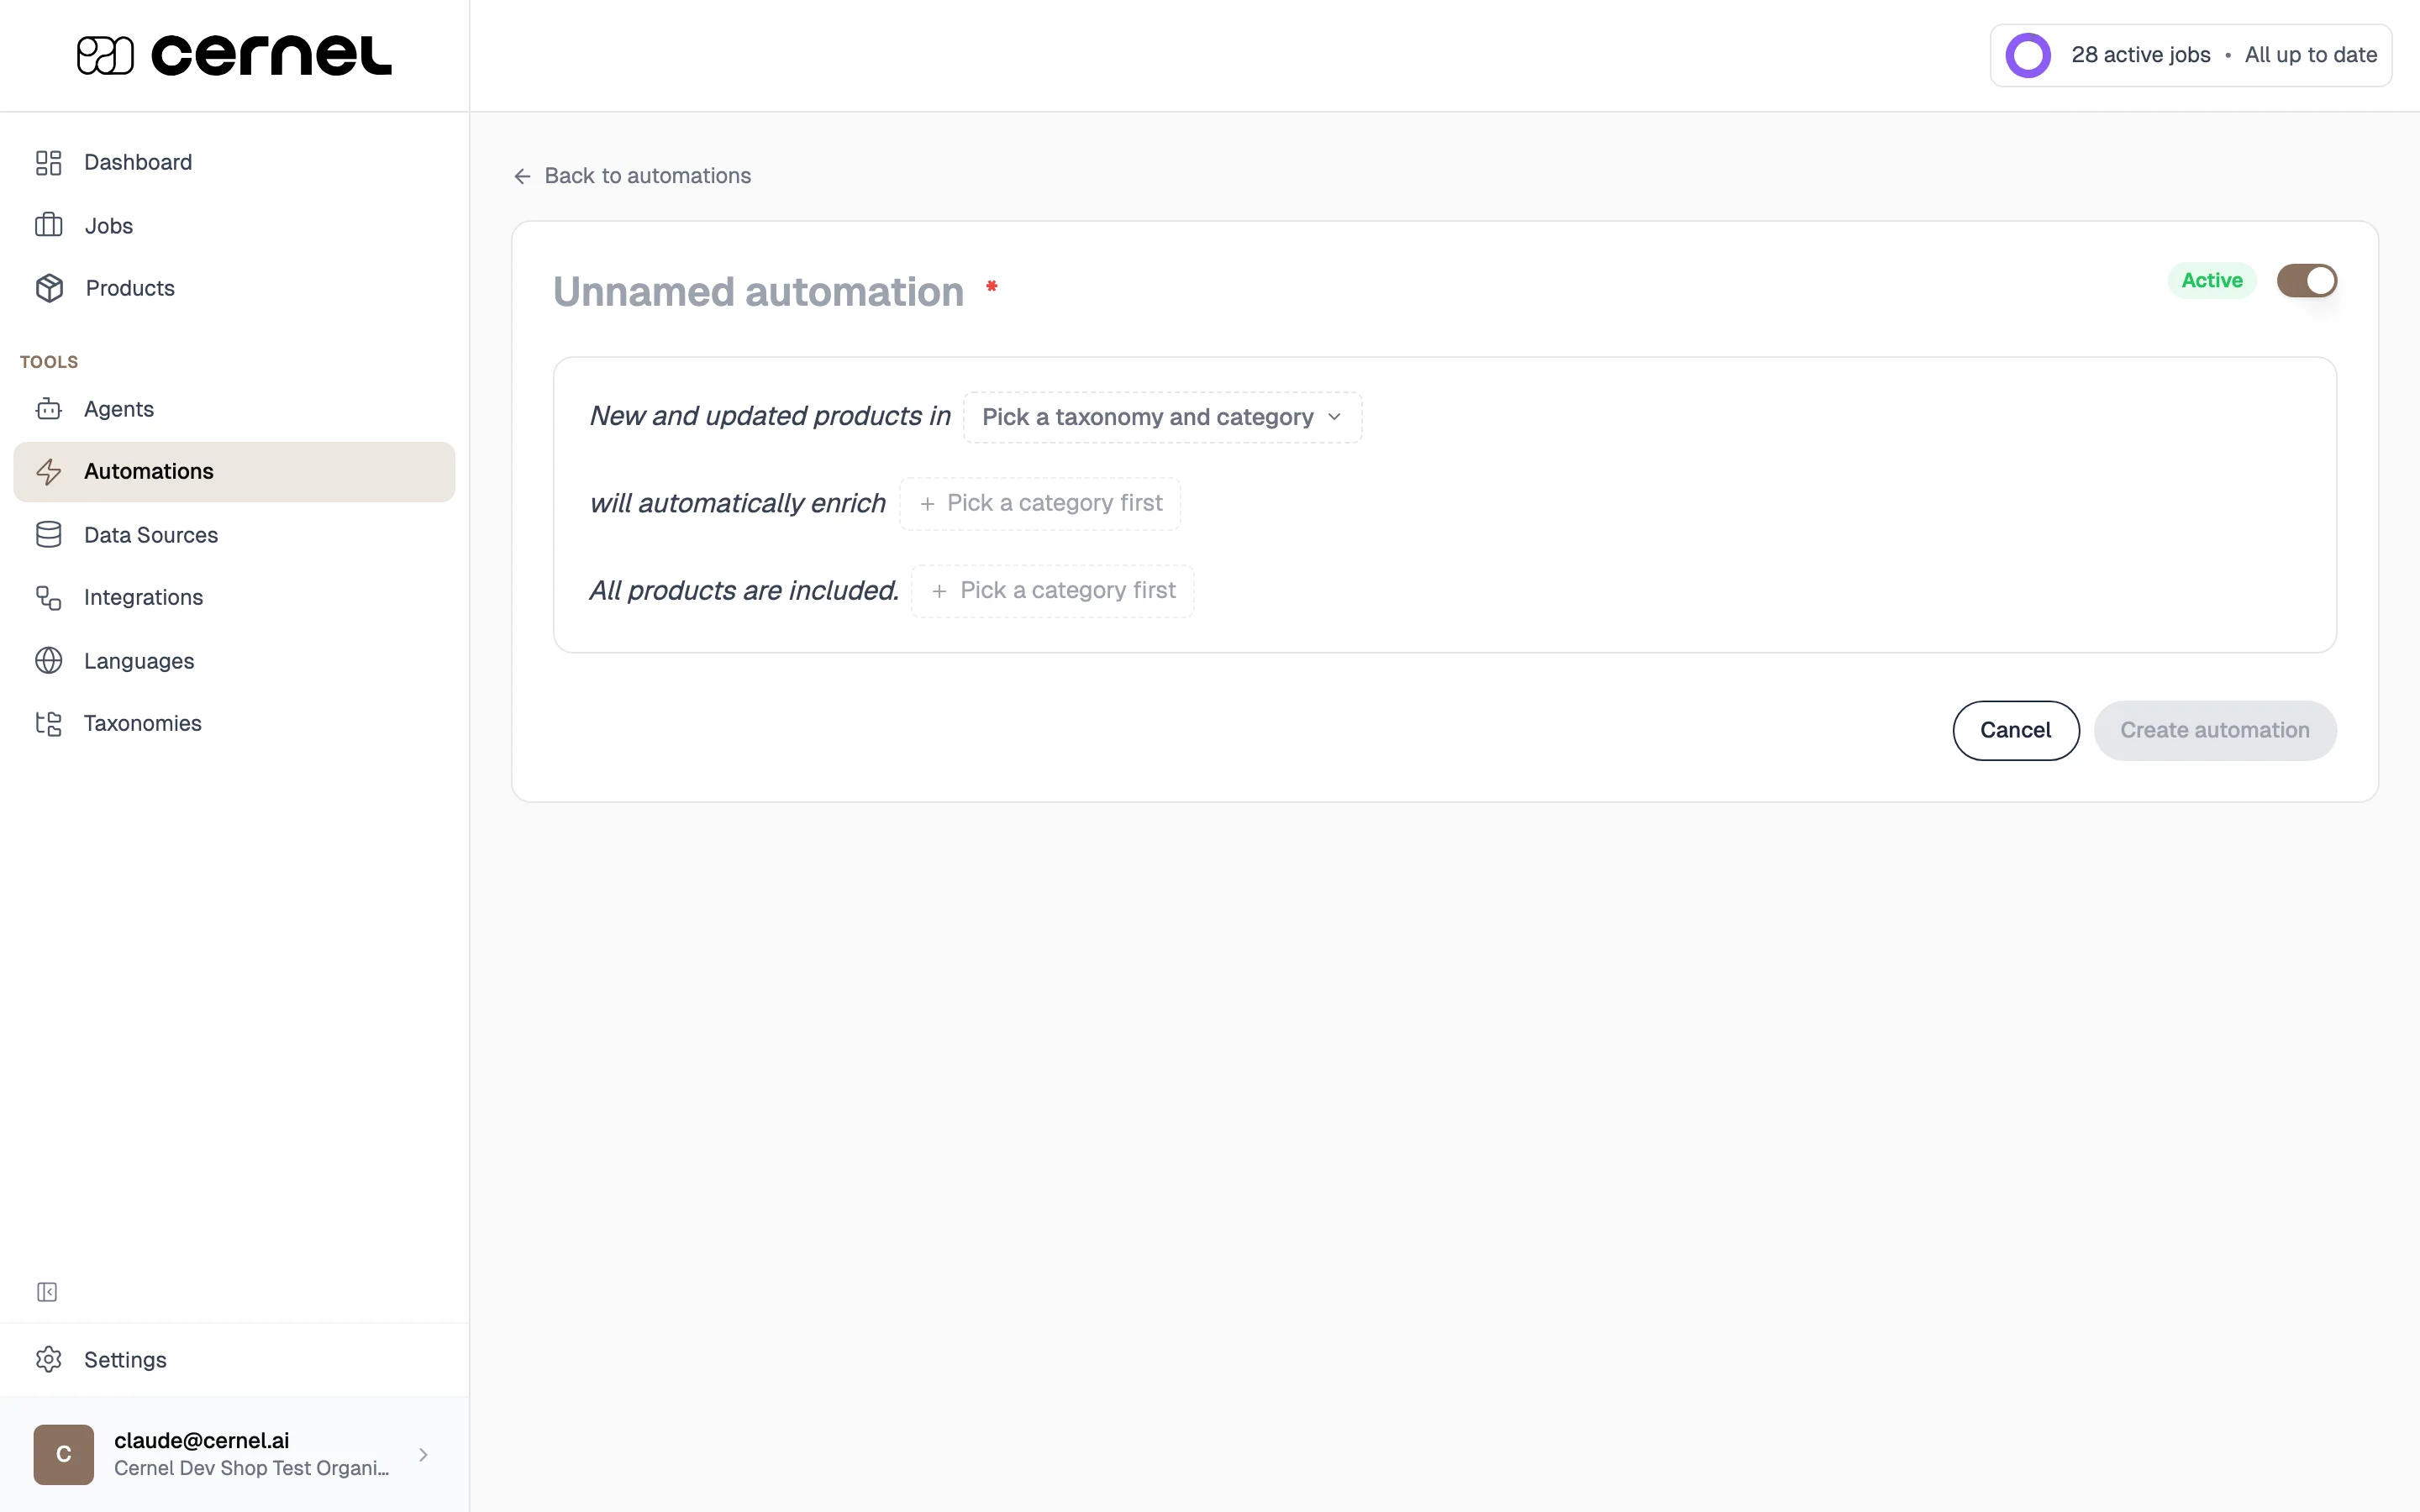
Click Create automation to open a blank automation on its own page. Give it a name in the Unnamed automation field at the top, then fill in the sentence below.
A blank automation page with an empty sentence builder
3
Pick a taxonomy and category
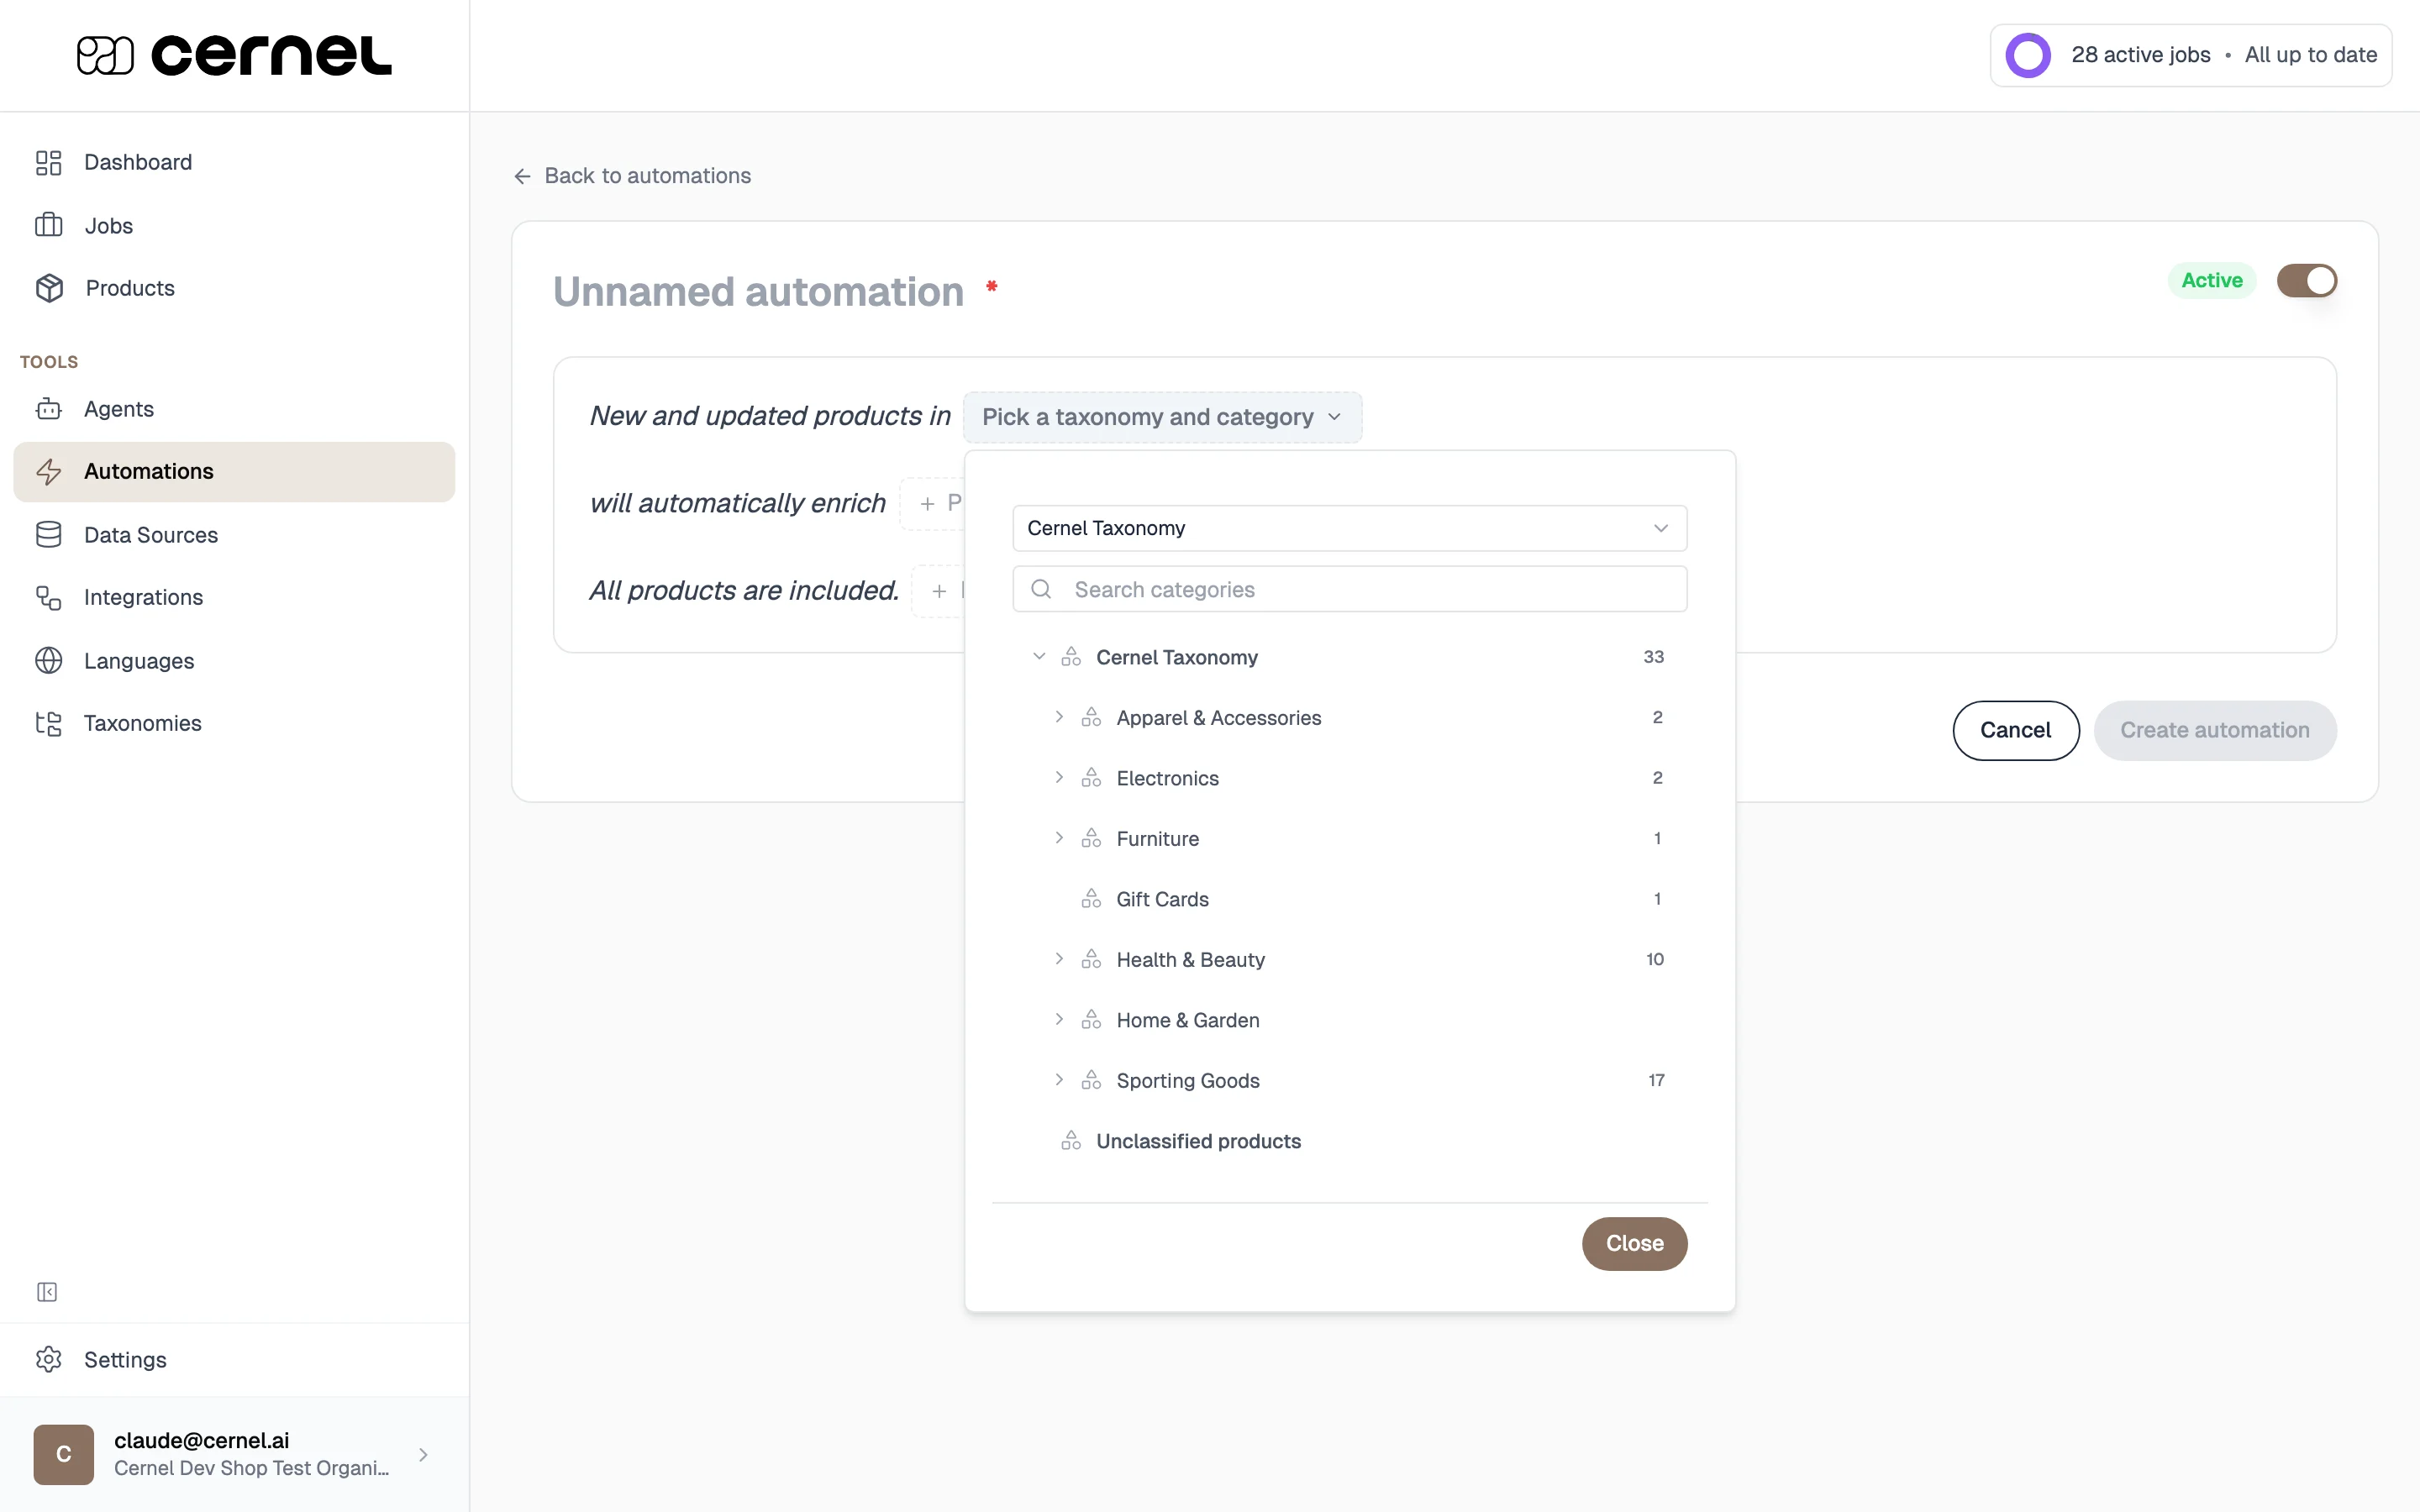
Click Pick a taxonomy and category. A popover opens with a taxonomy selector at the top and an expandable category tree below. Pick a taxonomy, then choose any category in the tree, or pick Unclassified products to target products that haven’t been classified yet.
The taxonomy and category picker
Switching taxonomies or categories after you’ve chosen attributes or filters clears them: attributes and filters are scoped to the category you picked.
4
Pick attributes to enrich
Click the Pick attributes slot in the second line of the sentence. Choose one or more attributes. Only attributes that have an AI agent linked appear here. Add as many as you need; each one becomes a chip in the sentence, and + Another attribute adds the next.The picker lists the attributes the category carries itself first, and then, under a From subcategories heading, the attributes defined at categories below it. Each subcategory attribute is labelled with the category it comes from, so you can pick attributes for a whole branch (for example every attribute across Clothing › Shoes, Pants, and Tops) from one automation on the parent category. Picking these attributes is safe: at run time each product only gets the attributes that apply to its own category, so a Shoes attribute simply resolves to nothing on a Pants product.
5
(Optional) Narrow down with filters
The third sentence line starts as “All products are included.” To restrict the automation to a subset, click Narrow down with a filter and add one or more conditions on attribute values or product properties. Each filter becomes a chip; + AND adds another condition.
Filters are optional. Leave them empty if you want every product in the category to be enriched.
6
(Optional) Set enrichment options
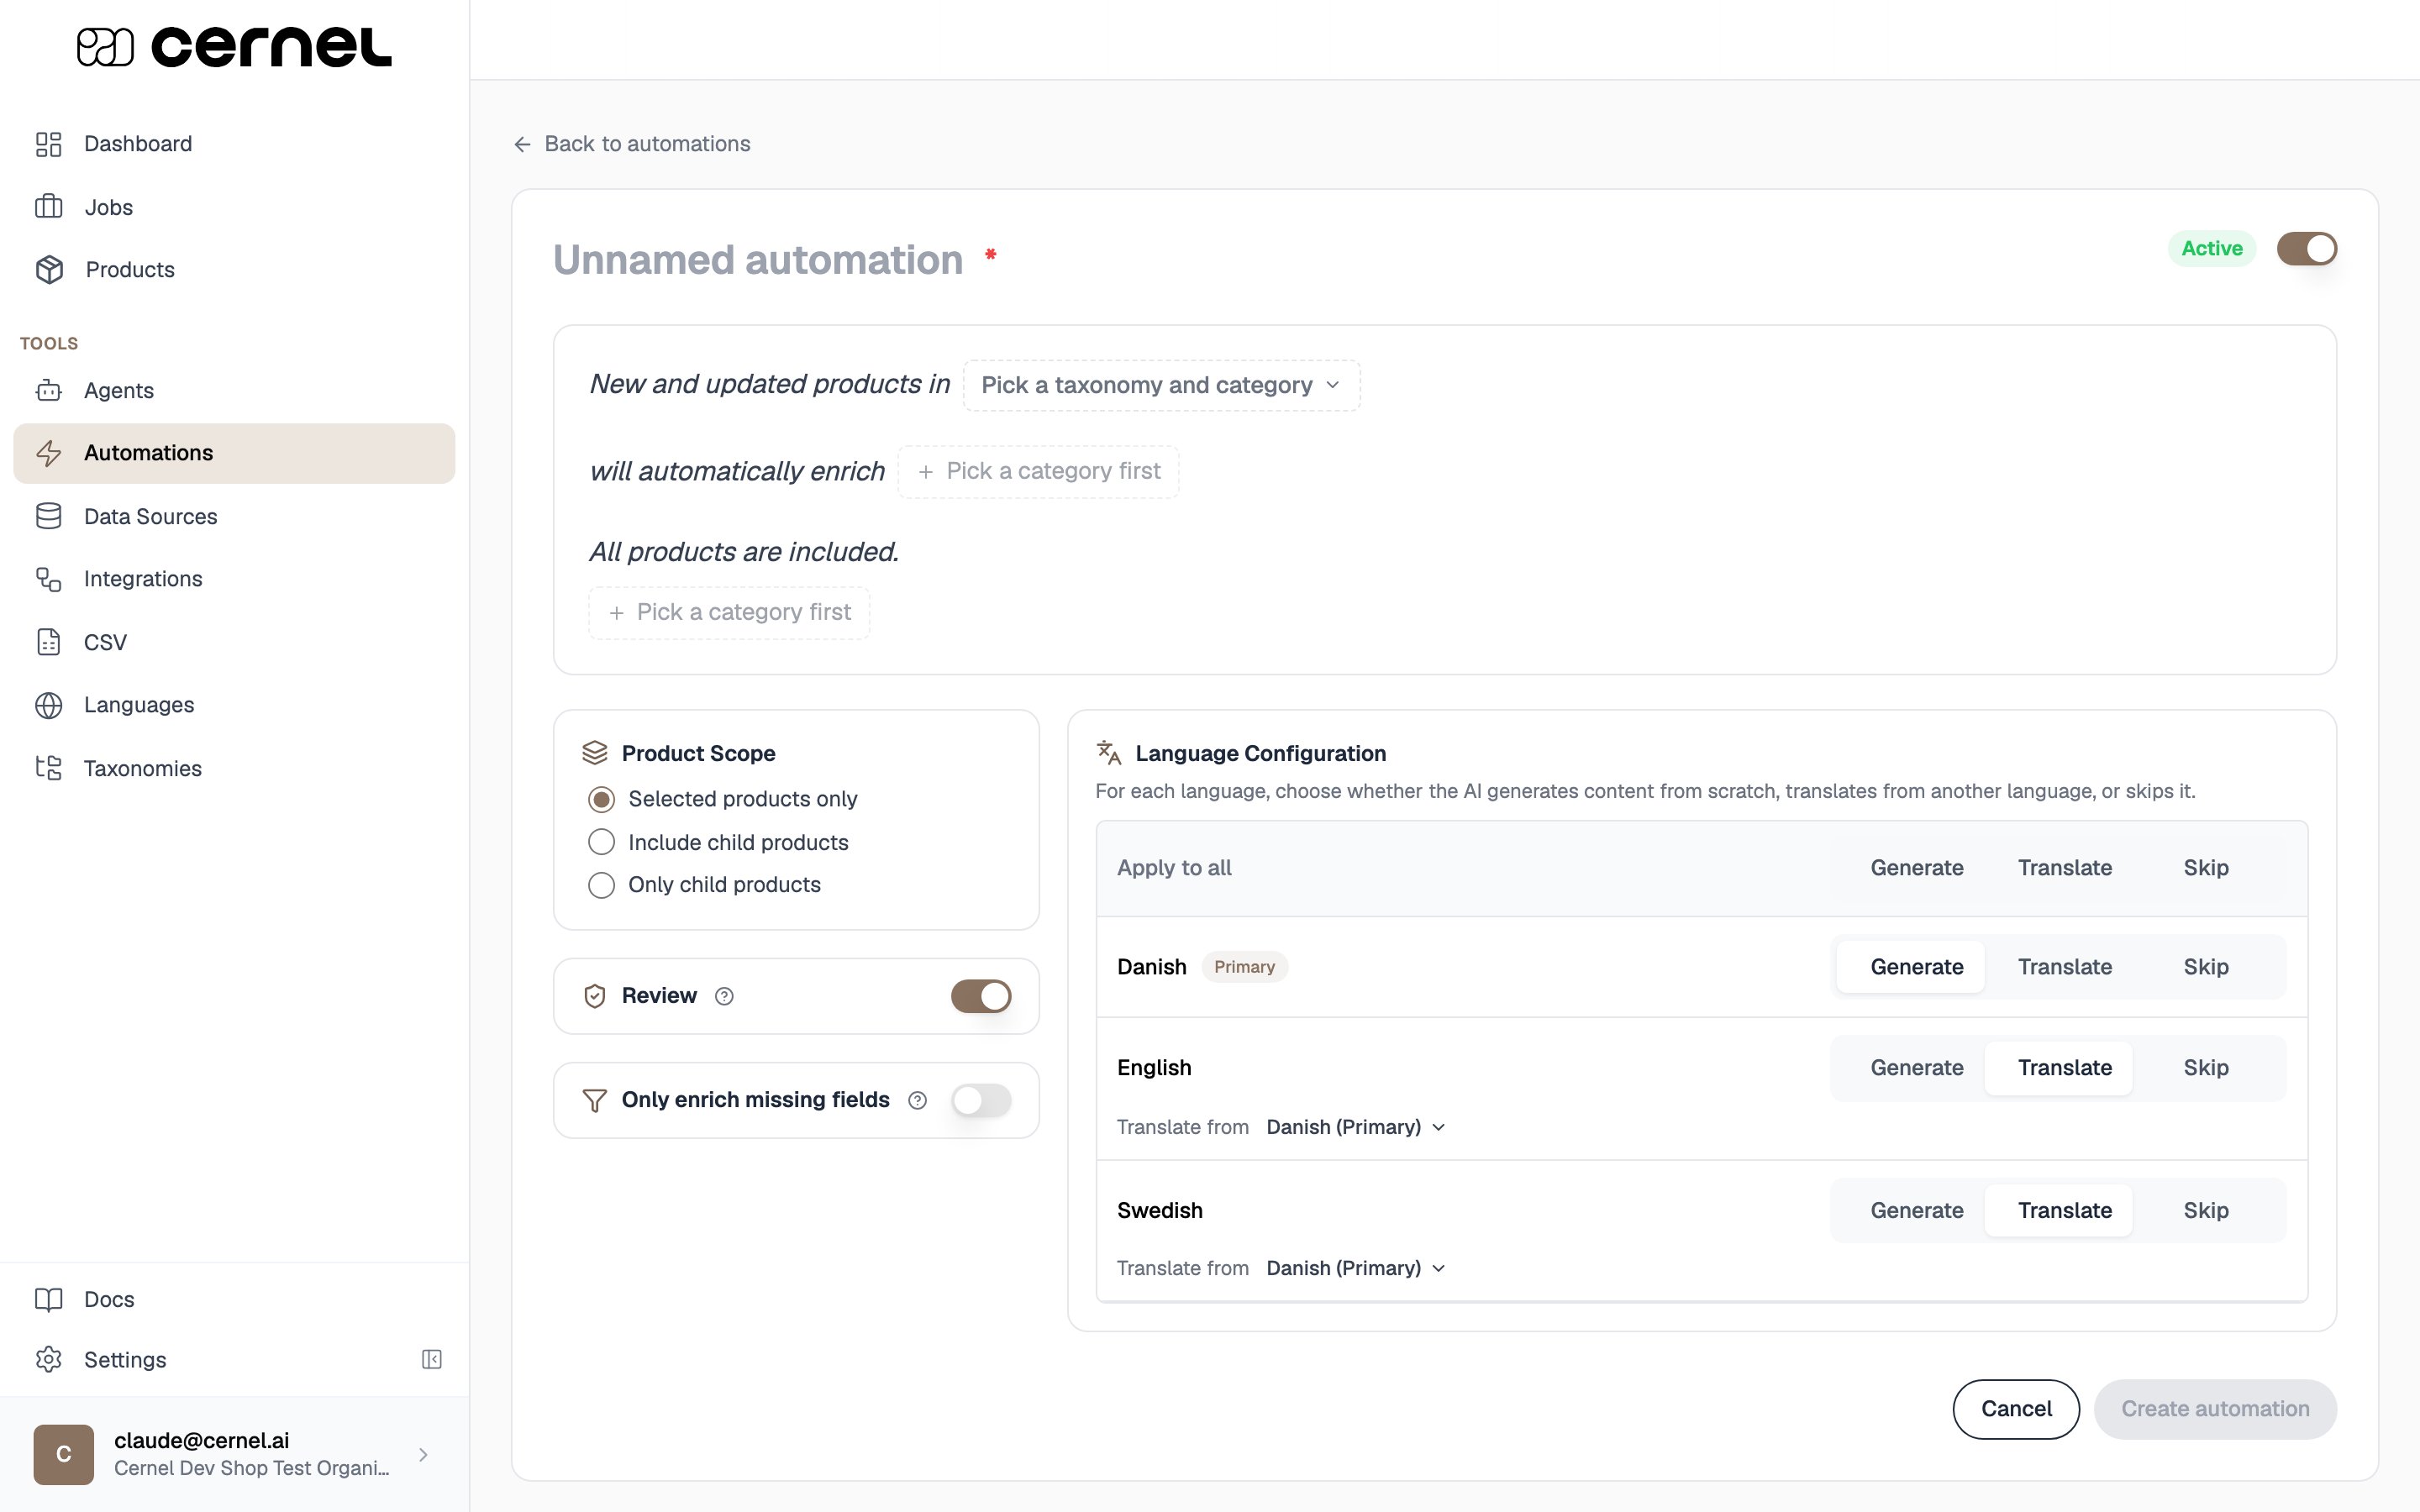
Below the sentence, the enrichment options control how each run behaves: product scope, whether values go through Review, whether to fill only missing fields, and per-language generate/translate/skip choices. The defaults work for most automations, so you can skip this and adjust later. See Enrichment options for what each control does.
7
Save the automation
Toggle Active in the top-right if you want the automation running immediately, then click Create automation.
Your automation is created and appears in the Automations list. Matching products will be enriched automatically with the selected attributes.
Below the sentence builder, every automation carries the same enrichment options as a manual enrichment run, so an automation and a hand-started run behave identically. These options are saved with the automation and applied to every run it triggers.
The enrichment options on an automation: Product Scope, Review, Only enrich missing fields, and Language Configuration
Product Scope: whether the automation enriches the matched products only, includes their child products, or runs only on the children. Pick Include child products or Only child products when your enrichment should reach variants beneath the products that match.
Review: when on, generated values are held as pending on the Review surface for approval before they go live. When off, values are applied to your products automatically. The starting position follows your organization’s approve-before-push setting, and you can override it per automation.
Only enrich missing fields: when on, existing values are left untouched and enrichment runs only for attributes that are currently empty. Use this when you want an automation to backfill new products without overwriting content you have already reviewed or hand-edited.
Language Configuration: for each language, choose whether the AI generates content from scratch, translates it from another language, or skips it. Use Translate from to set the source language for a translated language, and Apply to all to set the same mode for every language at once.
A language cannot be both a target for enrichment and a translation source for another language at the same time. If you select the same language for both, the page flags the conflict so you can resolve it before saving.
Click any row in the Automations list to open the automation’s detail page. The detail page uses the same sentence builder as creation: edit any slot in place, then click Save changes. Toggle Active in the top-right to pause or resume without losing the configuration, and use the red delete icon to remove an automation permanently.
You don’t have to open the detail page for quick changes. Each row in the Automations list carries two controls:
Active toggle: the switch on the right of each row pauses or resumes the automation in place. A paused automation stops processing products until you switch it back on.
Row menu: opens a short menu whose one action, Delete, removes the automation permanently. Deleting from here warns you first, just like the detail page does. The built-in Cernel Classification Automation can’t be deleted, so it shows no row menu.
To edit an automation’s configuration or view its run history, click anywhere else on the row to open its detail page.
Each automation is scoped to one taxonomy and category. If you have several taxonomies on the same products, create one automation per taxonomy / category combination; they run independently and write into different attribute sets.You can also pick Unclassified products as the category. An Unclassified automation targets products that haven’t been classified into the chosen taxonomy yet, and is limited to setting the classifying attribute of that taxonomy so the automation can place the product in the right category before any further enrichment runs.
Cernel ships with a built-in Cernel Classification Automation that classifies unclassified products into the Cernel Taxonomy. It appears in the Automations list with a System badge and can be paused but not edited or deleted.
Yes. A newly created product, or an existing product that changes (for example through an integration sync), becomes eligible, and the automation enriches it if it matches your conditions. Each automation processes a given product only once, so a product that has already run through an automation is not enriched by it again, even on a later change. To enrich a batch of products on demand, use manual enrichment from the products table instead.
Can an automation run on the same product more than once?
No. Each automation fires on a given product at most once. After it runs on a product, that product is permanently excluded from that same automation, even if the product is later edited or synced again. There is no cooldown that reopens it. A different automation can still process the same product, and you can always re-enrich on demand with manual enrichment from the products table.
Why isn't my automation triggering?
Check three things:
Is the automation active? Paused automations don’t process products. Check the Active toggle, either the switch on the automation’s row in the list or the Active switch on its detail page.
Do the conditions match? If you set filters, products must match them. Open the automation and check the sentence; remove a filter temporarily to test.
Are the attributes still configured? The selected attributes must have AI agents linked. Check the category’s attribute configuration.
What happens if I edit a running automation?
Changes take effect for the next products that match. Products currently being processed complete with the previous configuration; products evaluated after you save use the new sentence.
Can I have multiple automations for the same category?
Yes. You can create multiple automations with different attributes and filters for the same category. Each runs independently when its conditions are met. For example:
Automation 1: Cernel Taxonomy › Apparel → Meta Title, Meta Description (basic SEO for everything)
Automation 2: Cernel Taxonomy › Apparel, filtered to has images → Product Description, Materials (rich content only where the AI can see the product)
Can one automation enrich attributes that live on subcategories?
Yes. When you pick attributes, the picker offers the ones the chosen category carries itself and, under a From subcategories heading, the ones defined at categories below it, each labelled with the category it comes from. So a single automation on a parent category can cover attributes that differ from leaf to leaf, instead of one automation per leaf. Each product still only gets the attributes that apply to its own category, so an attribute from a sibling branch simply resolves to nothing on products it doesn’t apply to.
How do I know if an automation failed?
Open the automation and switch to the Run history tab. Failed runs show a red Failed badge; expand the row to see which specific products encountered errors and follow the link into the product detail view.
Should I pause automations during bulk imports?
Optional. If you’re importing a large batch and don’t want each new or updated product to enqueue a job, pause the relevant automations first, complete the import, then resume them and manually enrich the batch on your own schedule.
Can I limit an automation to specific languages?
Yes. Use the Language Configuration panel in the automation’s enrichment options. Set any language to Skip to leave it out, Generate to write fresh content for it, or Translate to derive it from another language. Only the languages you set to Generate or Translate are enriched by the automation.
Do automation results go through Review before they're saved?
It depends on the Review toggle in the automation’s enrichment options. With Review on, generated values wait on the Review surface for your approval before they go live. With Review off, they’re applied to your products automatically. The toggle starts from your organization’s approve-before-push setting, and you can override it per automation.
What is the Cernel Classification Automation in my list?
It’s a built-in system automation that classifies products into the Cernel Taxonomy when they don’t have a Cernel category yet. You can pause it from the list view if you want to take full control of classification, but it can’t be edited or deleted.