Build your own category hierarchies and let AI classify your products into them.
Alongside the built-in Cernel Taxonomy, you can build your own taxonomies: category hierarchies that match how your business thinks about its catalog. You define the categories and describe them in plain language, then Cernel’s AI reads each product and places it into the right category automatically. Test the result on a handful of products before you classify the whole catalog.
The Cernel Taxonomy is a general-purpose hierarchy that works out of the box. A custom taxonomy is useful when you need categories that are specific to your business: a merchandising structure, a marketplace’s required categories, an internal reporting hierarchy, or a partner’s classification scheme. You can keep several taxonomies side by side and classify the same products into each one.
Categories in your own words
Describe each category in plain language. The AI uses your descriptions and instructions to decide which products belong where, so you never sort products by hand.
Test before you commit
Try your categories and prompt on a few products in the sandbox, refine the wording, and only classify the full catalog once the results look right.
Taxonomy: a hierarchy of categories. You can have more than one. The Cernel Taxonomy is a built-in System taxonomy whose category descriptions are locked; taxonomies you create are fully editable.
Defining attribute: every taxonomy has one product attribute that stores each product’s category in that taxonomy. You name it when you create the taxonomy (for example, category). This attribute is a Taxonomy Classification agent, which assigns products into the hierarchy automatically.
Category: a node in the tree. Each category has a Description (what belongs here) and Additional Instructions (how to sort products into its subcategories).
Classification: the AI walks the tree from the top, choosing a subcategory at each level until it reaches the most specific category that fits the product. A taxonomy can also be set up to place a product in more than one category.
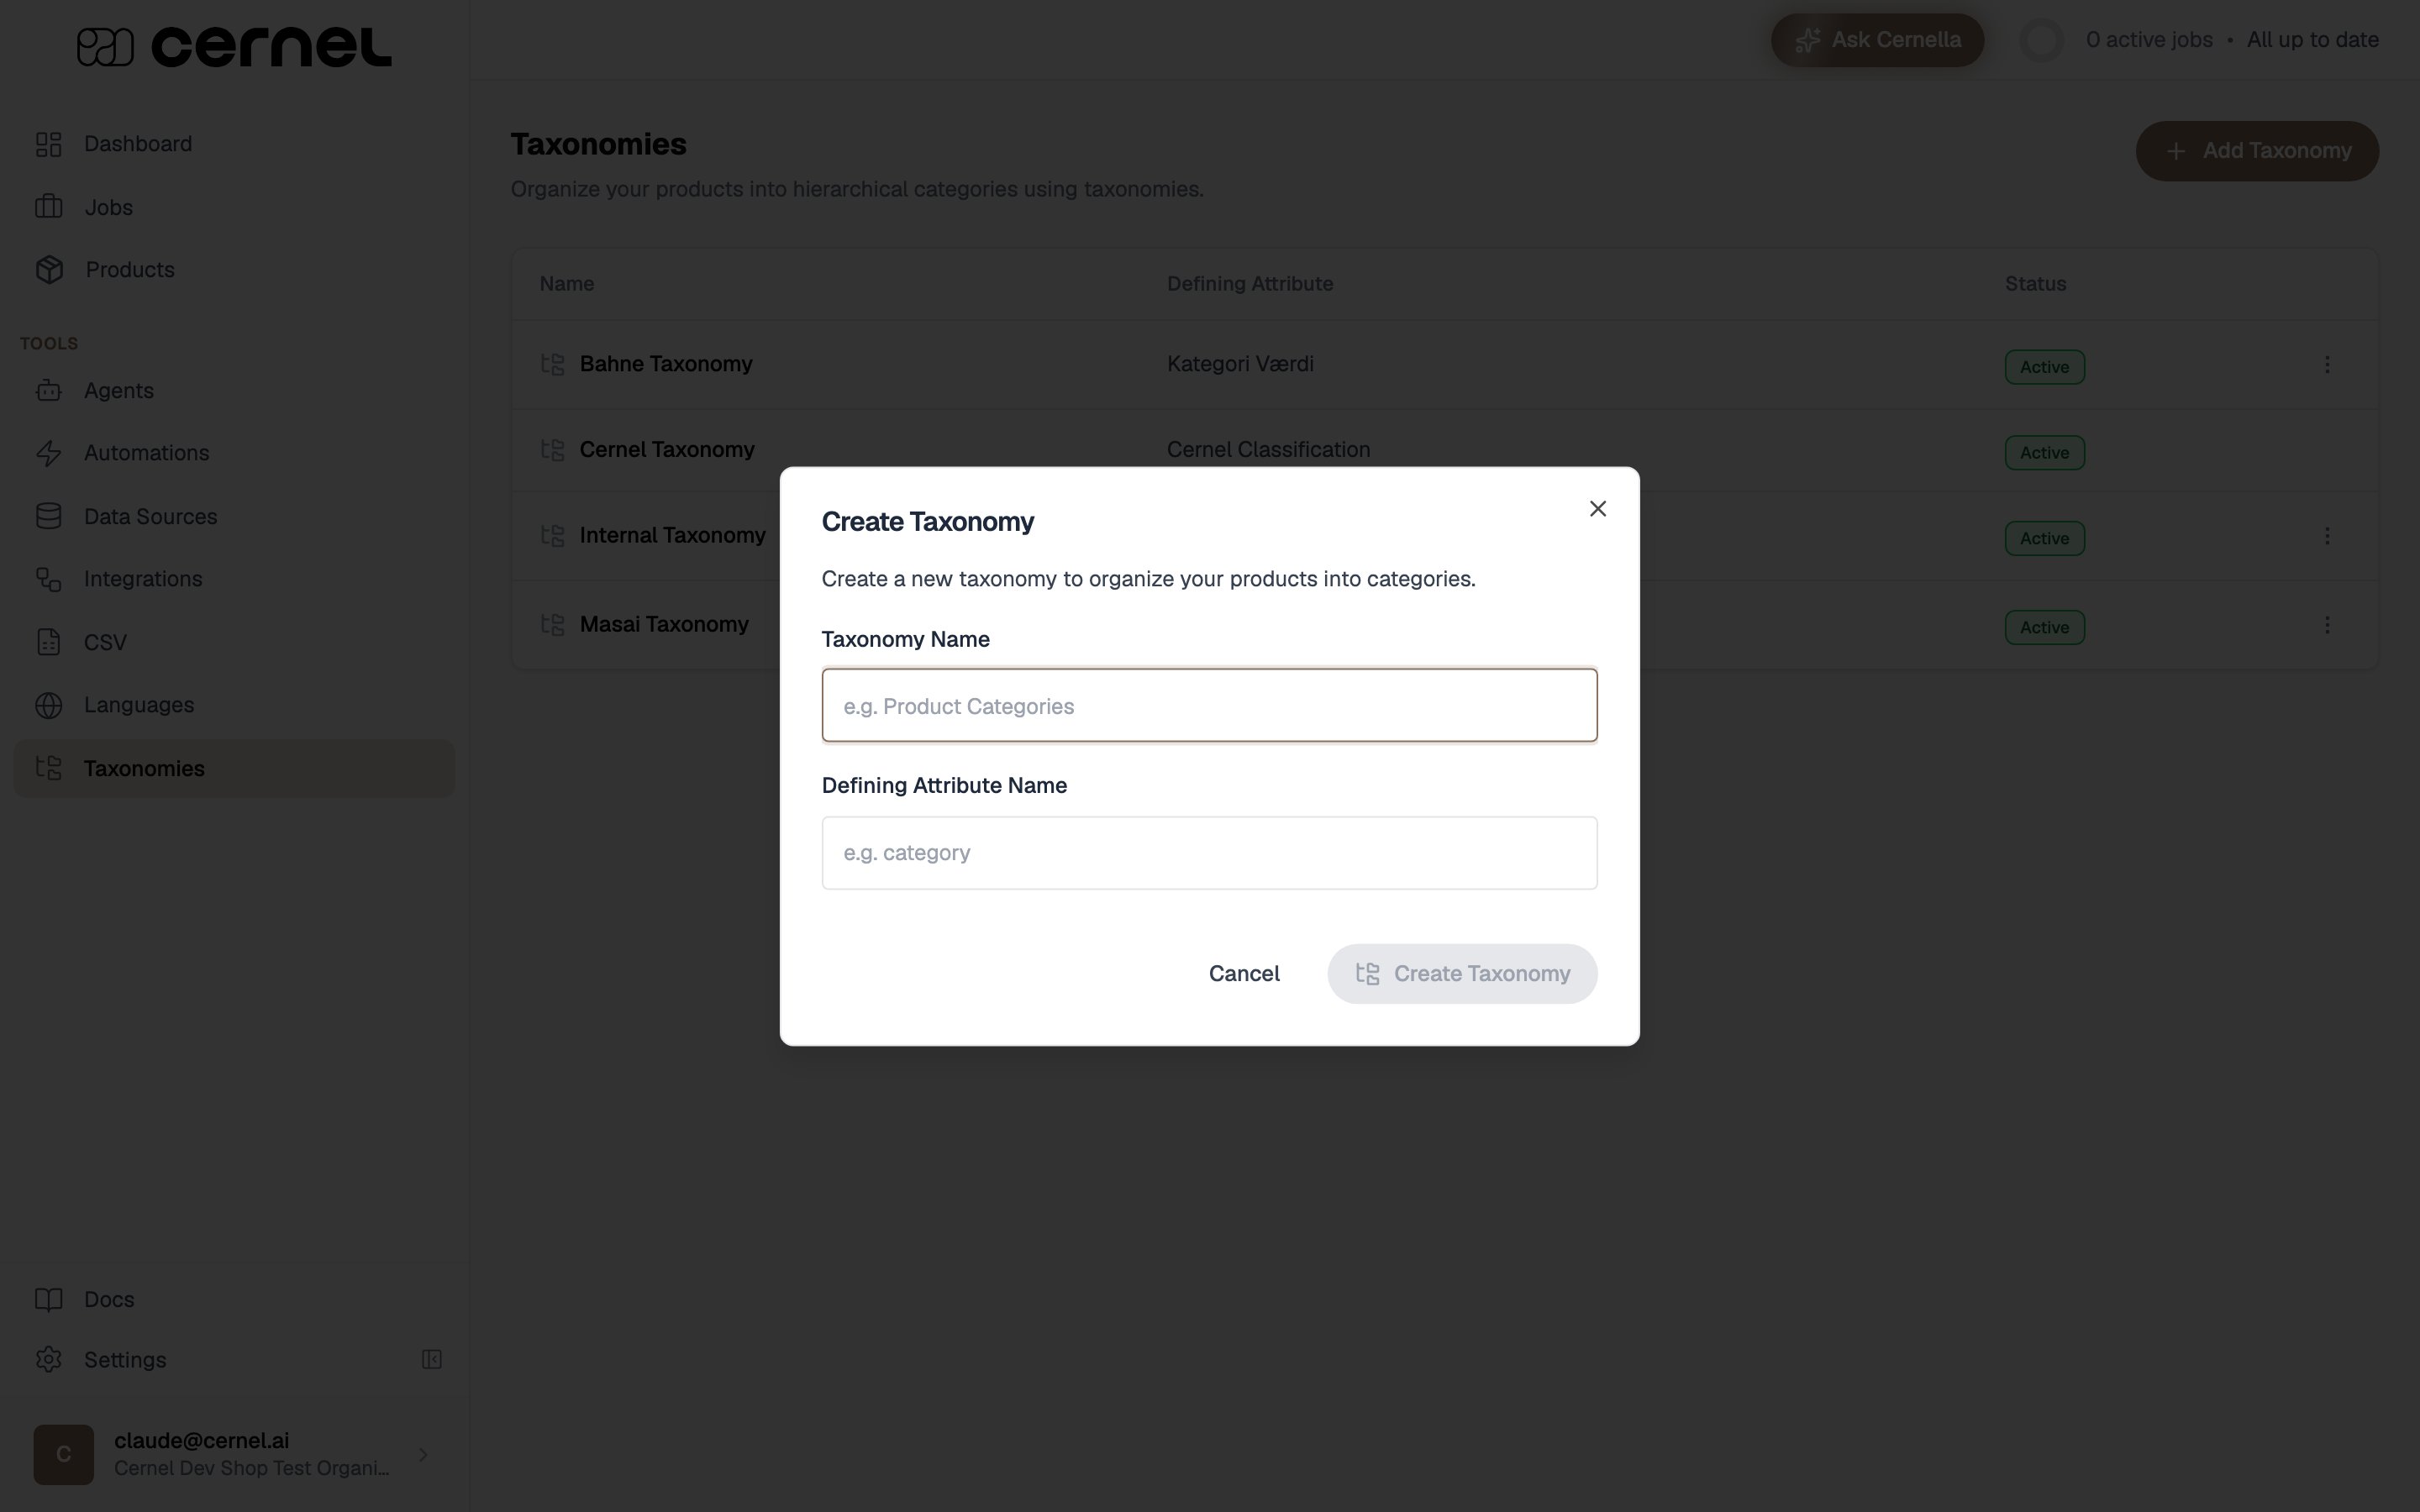
Go to Tools > Taxonomies in the sidebar. The list shows every taxonomy in your organization with its Name and Defining Attribute. Each row has an actions menu (the … button) for renaming, deleting, or hiding the taxonomy from your own view, and a taxonomy you have hidden carries a Hidden badge. Click Add Taxonomy.
2
Name the taxonomy and its defining attribute
Give the taxonomy a Taxonomy Name (for example, “Product Categories”) and a Defining Attribute Name (for example, category). The defining attribute is the product attribute that will hold each product’s category in this taxonomy. If an attribute with that name already exists, Cernel reuses it.
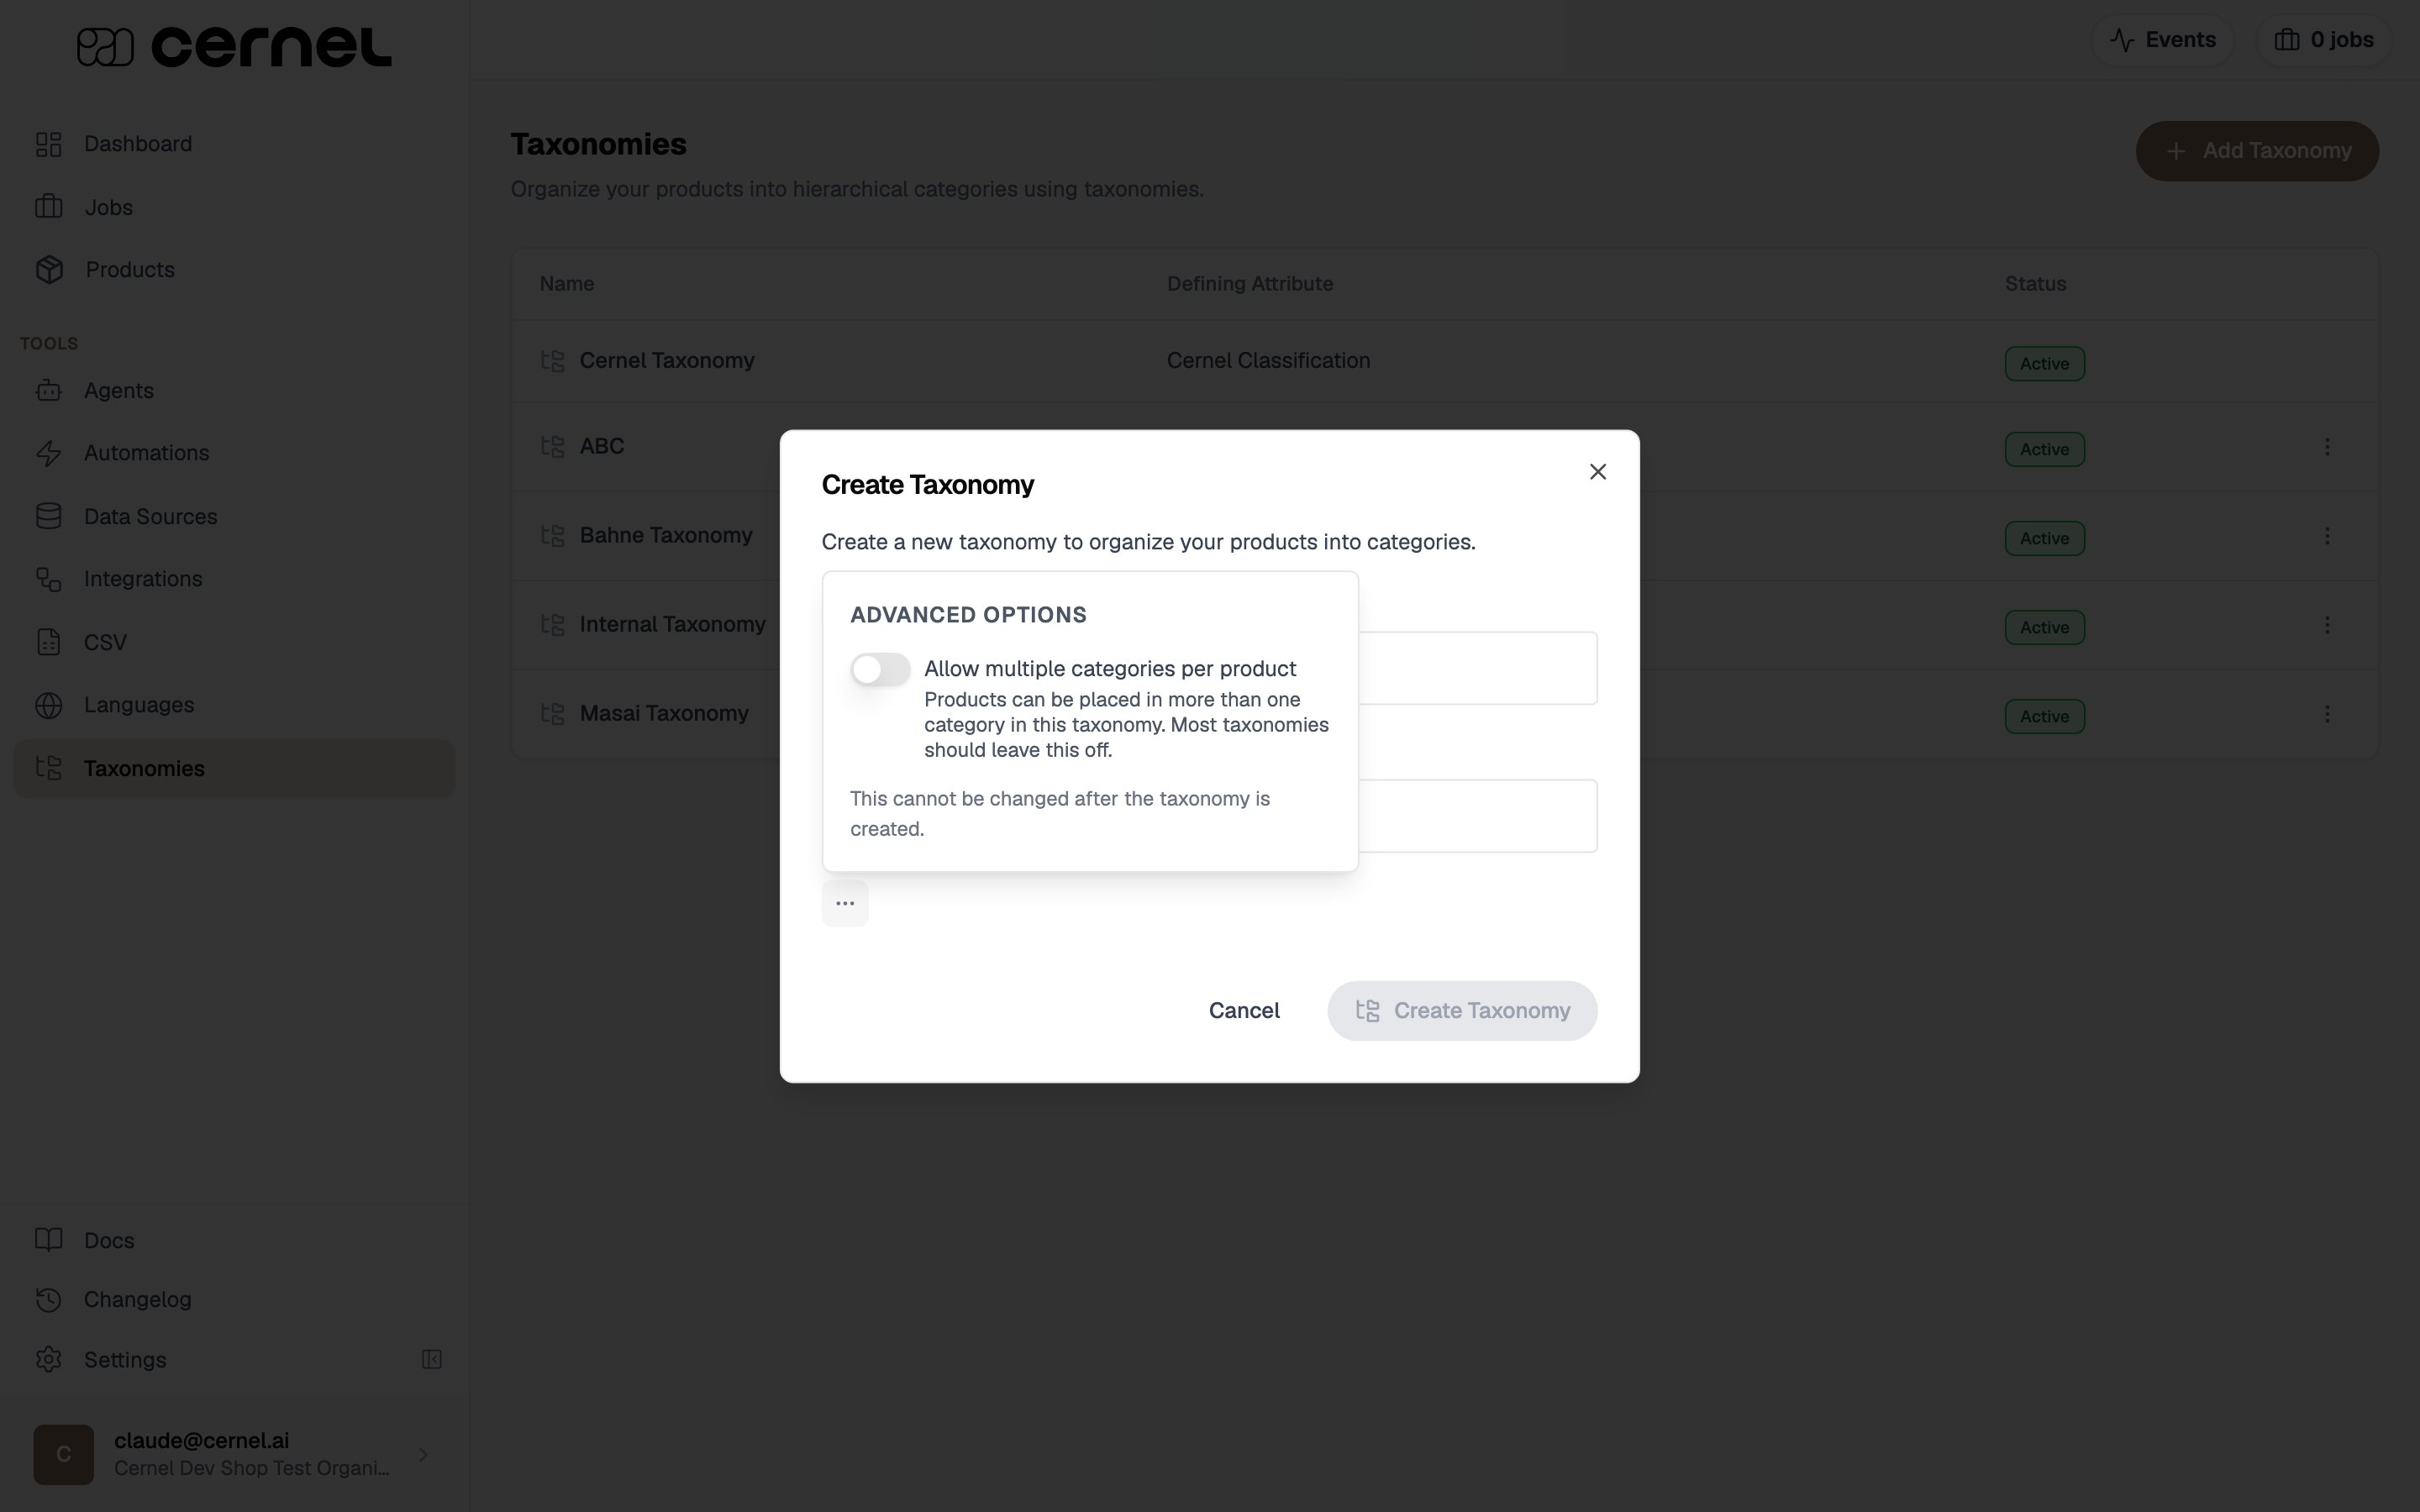
By default, each product is placed in exactly one category in the taxonomy. If you want products to be able to belong to several categories at once, open the options menu (the … button) in this dialog and turn on Allow multiple categories per product. This is a permanent choice for the taxonomy: it cannot be changed after the taxonomy is created. See Placing products in more than one category.
3
Build your category structure
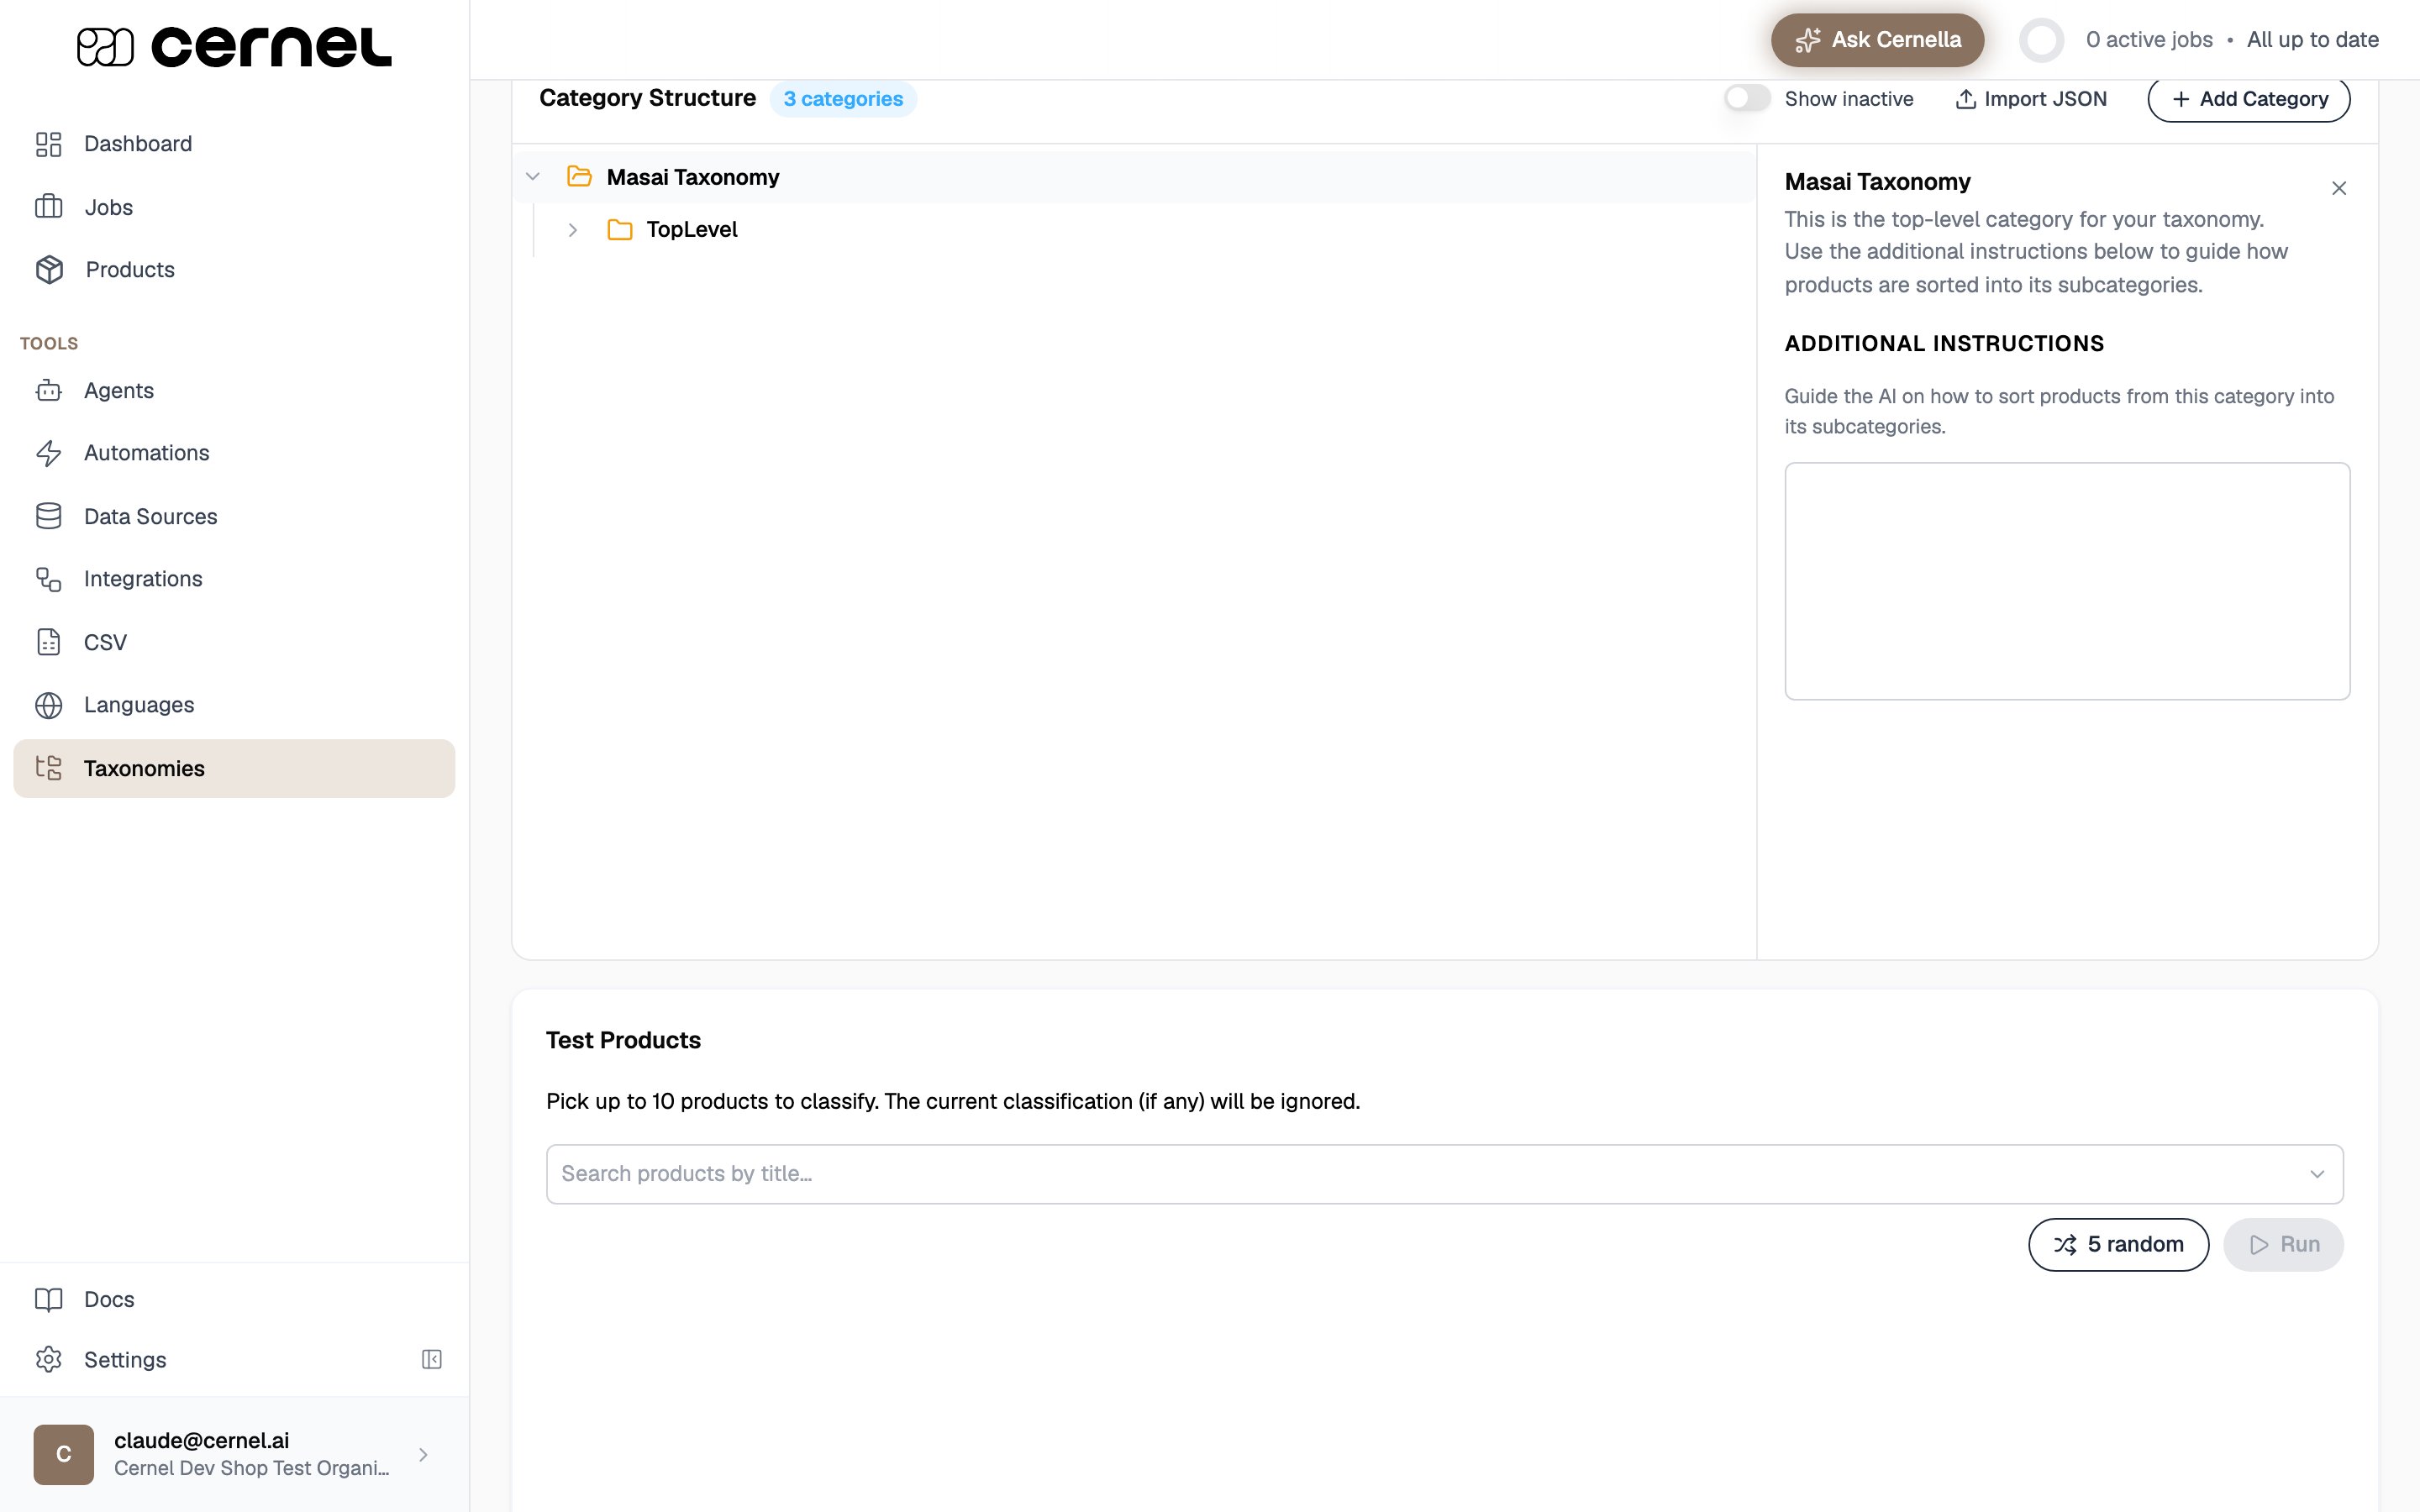
Open the new taxonomy to reach its detail page. Under Category Structure, use Add Category to create a top-level category and Add Subcategory to nest categories beneath it. To create many categories at once, use Import JSON and paste an array of categories.Click any category to open its editor on the right. Each category has two fields:
Description: a general description of the category and the products it contains. The AI uses this to decide which products belong here.
Additional Instructions: guidance on how the AI should sort products from this category into its subcategories (for example, “Classify by primary function first, then by target audience”).
Edits save automatically when you click away from a field. The top-level category has only Additional Instructions, since nothing sits above it.
Keep descriptions concrete and product-focused. “Waterproof outerwear such as rain jackets and shell coats” guides the AI far better than “Jackets”.
4
Set the classification prompt and activation depth
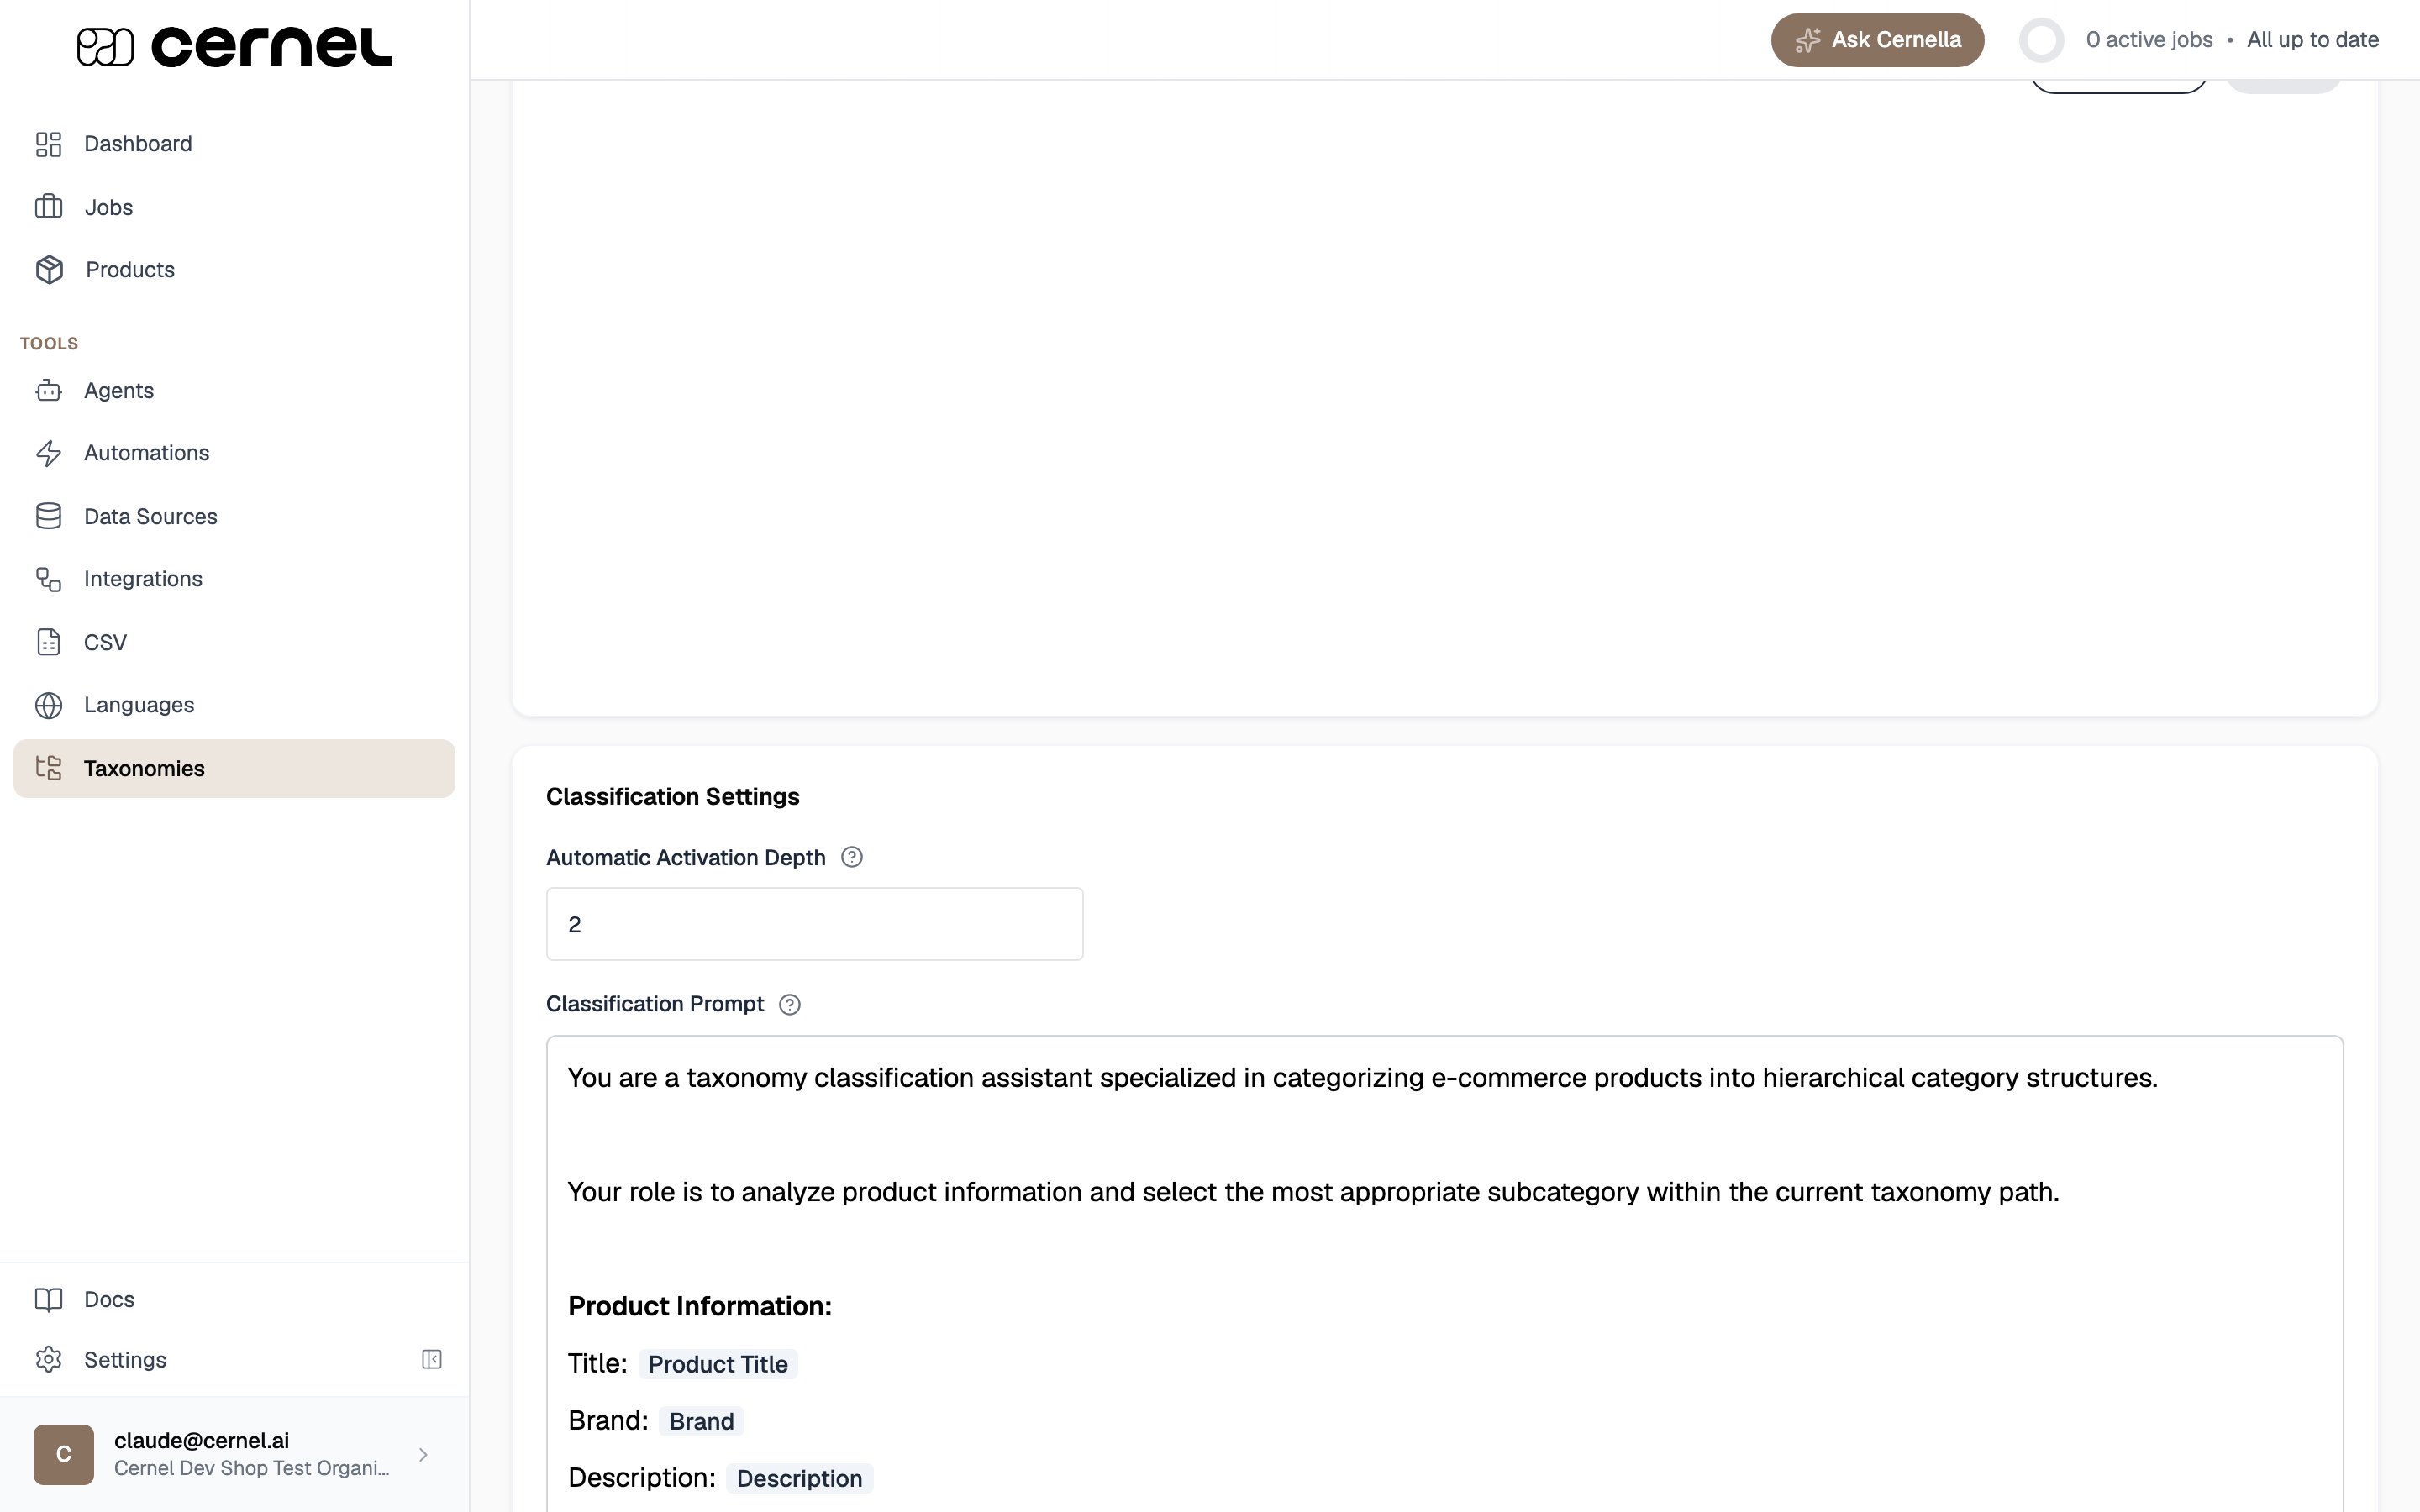
In Classification Settings, tune how the AI classifies products into this taxonomy:
Classification Prompt: extra instructions sent to the model for the whole taxonomy. Each category’s description and additional instructions should do most of the work; use this prompt only for global rules (for example, “Prefer the most specific category. When in doubt, use the closest parent category.”).
Automatic Activation Depth: how many levels deep Cernel automatically activates categories when a product is classified into them. Set it to 0 to disable automatic activation so only the top-level category stays active.
5
Test on a few products in the sandbox
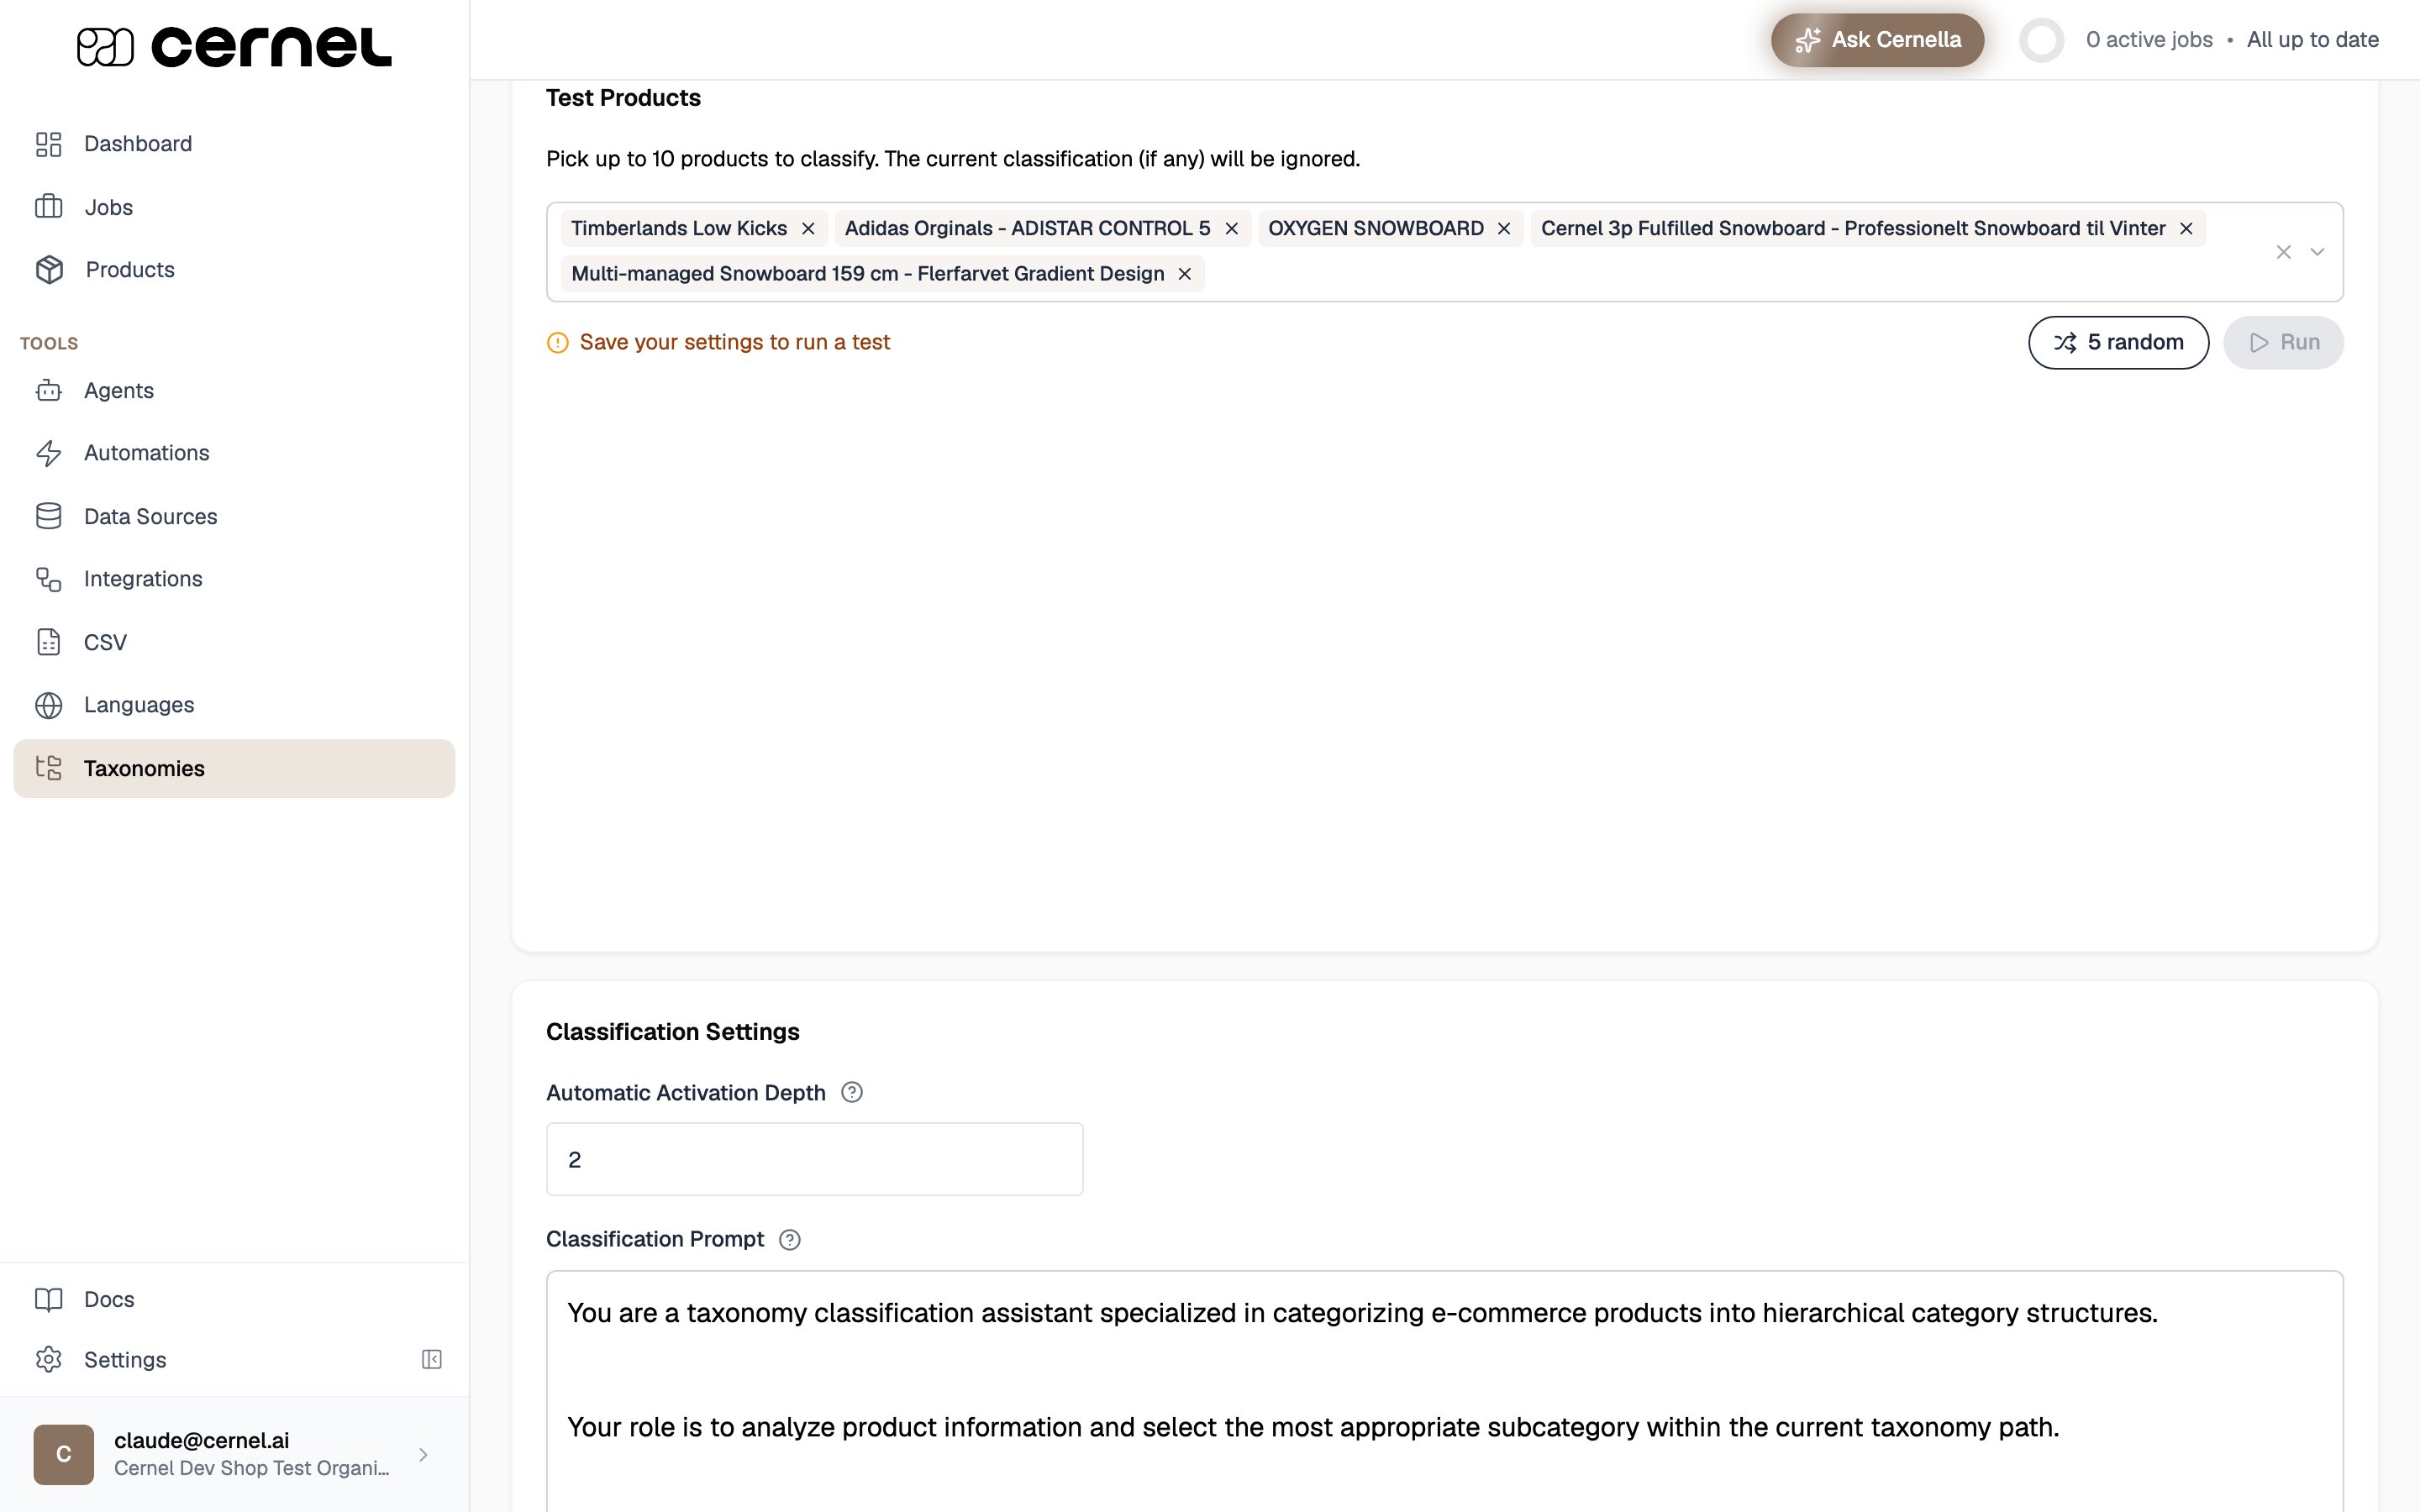
Use Test Products to see how your categories and prompt perform before classifying the whole catalog. Search for products or click 5 random to pick a sample (up to 10), then click Run. Cernel classifies each product with your current settings and shows the category it chose, along with the AI’s reasoning. Any existing classification is ignored, so you always see a fresh result.Adjust your category descriptions, additional instructions, or the classification prompt, then Run again until the results look right.
Your Classification Settings save automatically when you click away from a field, the same as category edits, so there is no separate Save button. The Run button stays disabled until your most recent change is saved, so click out of the field you just edited and it becomes available.
Creating a taxonomy does not reclassify your catalog on its own. To populate it, run its classification:
1
Run the classification from Products
On the Products page, run the taxonomy’s defining attribute (a Taxonomy Classification agent) as an enrichment on the products you want to classify. Cernel walks the tree and assigns each product to the most specific category that fits.
2
Or automate it
Set up the classification in Automations to run on a schedule or when products change, so new products are classified without manual steps.
3
View products by taxonomy
On the Products page, use the taxonomy selector (Select taxonomy) to view your catalog organized by any taxonomy you have built. As products are classified, the matching categories activate (up to your activation depth) and each product’s category in that taxonomy is filled in.
Switching your view to a custom taxonomy does not change or remove a product’s category in any other taxonomy. Each taxonomy stores its own classification independently, so a product can belong to a category in the Cernel Taxonomy and a different category in your custom taxonomy at the same time.
Most taxonomies place each product in a single category. Some catalogs need more: a jacket that is genuinely both waterproof and insulated, or a product a marketplace expects to appear under two departments. For these cases you can set up a taxonomy that assigns each product to more than one category.This is a per-taxonomy choice you make when you create the taxonomy, by turning on Allow multiple categories per product under the options menu in the Create Taxonomy dialog. It is permanent for that taxonomy and cannot be changed later, so leave it off unless you know a product should be able to sit in several categories at once. Because taxonomies are independent, a product can be placed in one category in a single-category taxonomy and in several categories in a multi-category taxonomy at the same time.
When a taxonomy allows multiple categories, its Classification Settings show an extra Multicategory Agent Settings section with two controls that shape the result:
Max Categories per Product: the most categories one product can be placed in, from 1 to 5 (3 by default). This is a ceiling, not a target. The AI still assigns fewer categories when only one fits, so raising the limit does not force extra categories onto products.
Categories and Their Subcategories Together: off by default. When on, a product can sit in a category and in one of that category’s own subcategories at the same time (for example, both “Shoes” and “Running Shoes”). When off, only the most specific matching category is kept.
Instead of walking straight down to a single category, the AI works level by level. At each branch it keeps every subcategory that genuinely fits the product, not just the single best one, and repeats this until nothing more specific applies. A final pass reviews the full set of proposed categories together and drops any that do not hold up, always keeping at least one. The result is a set of categories that each fit the product, with the AI’s reasoning saved alongside, up to your Max Categories per Product limit.
You can always override the AI. In the category editor for a product’s classification in a multi-category taxonomy, tick or untick the categories the product belongs to and save. The editor lets you select one or more categories, so you can add a category the AI missed or remove one that does not belong.
Use Import JSON on the Category Structure card to add many categories at once. Paste an array where each entry has an external_id (a unique reference within the import) and a name. Use parent_external_id to nest a category under another entry in the same paste. Entries without a parent_external_id are added at the top level.
Activating and deactivating categories
Categories can be active or inactive. Deactivating a category hides it and its subcategories when you browse products by category, but products already classified in them keep their classification. You must deactivate a category’s subcategories before deactivating it. Use the Show inactive toggle to reveal inactive categories in the tree. Automatic Activation Depth controls how far down the tree Cernel turns categories on as it classifies products.
Hiding a taxonomy from your view
If you keep several taxonomies but only work in some of them, you can hide the ones you don’t use so they stay out of your way. On Tools > Taxonomies, open a taxonomy’s actions menu (the … button) and choose Hide. A hidden taxonomy no longer appears in the taxonomy selector when you browse products by category, and it carries a Hidden badge in the Taxonomies list. Choose Show from the same menu to bring it back.Hiding is per person: it changes only your own view, and it never affects anyone else in your organization. It also leaves every category and every product’s classification untouched, so nothing is reclassified and nothing is lost. You can hide the built-in Cernel Taxonomy this way too, but you can’t hide your last remaining visible taxonomy, since there would be nothing left to browse. Show another one first.This is different from deactivating a category, which is an organization-wide change to a single category inside one taxonomy. Hiding a taxonomy is a personal view preference that covers the whole taxonomy.
Running several taxonomies at once
You can keep multiple taxonomies side by side, each with its own defining attribute and classification prompt. Classify the same products into each one by running each taxonomy’s classification. This is useful when different teams or channels need the same catalog organized in different ways.
There is no single switch that makes one taxonomy the only active one. Every taxonomy you create is Active and available at once. To work in a custom taxonomy, run its classification on your products and use the taxonomy selector on the Products page to view your catalog organized by that taxonomy. Each product keeps its category in every taxonomy independently.
What is the difference between a category's Description, its Additional Instructions, and the Classification Prompt?
The Description tells the AI what a category contains, so it can decide which products belong there. Additional Instructions tell the AI how to sort products from that category into its subcategories. The Classification Prompt is a single set of global rules for the whole taxonomy. Category descriptions and instructions should drive most decisions; keep the classification prompt for organization-wide rules.
Does creating a taxonomy reclassify my products automatically?
No. A new taxonomy starts empty. Products are classified only when you run the taxonomy’s classification from the Products page or through an Automation. Existing classifications in other taxonomies are left untouched.
Can I edit the built-in Cernel Taxonomy the same way?
The Cernel Taxonomy is a System taxonomy: its category names and descriptions are fixed. You can still adjust each category’s Additional Instructions to steer how products are sorted into its subcategories. Full editing of names, descriptions, and structure is available on taxonomies you create.
How deep should my taxonomy go?
Go as deep as your products need distinct handling. Deeper trees give more precise categories but take more thought to describe well. The Automatic Activation Depth setting lets you keep deeper levels turned off until you are ready to use them.
Can a product be in more than one category?
Yes, if the taxonomy is set up for it. Turn on Allow multiple categories per product when you create the taxonomy, then the AI can place each product in several categories at once, up to the Max Categories per Product limit in Classification Settings. Single-category taxonomies, including the built-in Cernel Taxonomy, keep one category per product. See Placing products in more than one category.
Can I turn multiple categories on for a taxonomy I already created?
No. Whether a taxonomy allows multiple categories per product is chosen when the taxonomy is created and cannot be changed afterward. If you need multiple categories for an existing single-category taxonomy, create a new taxonomy with the option turned on and classify your products into it.
Can I hide a taxonomy I don't use?
Yes. On Tools > Taxonomies, open the taxonomy’s actions menu (the … button) and choose Hide. It disappears from the taxonomy selector when you browse products by category and gets a Hidden badge in the list. Choose Show to bring it back. Hiding changes only your own view, not your teammates’, and it leaves every category and classification exactly as it was. You can’t hide your last visible taxonomy: show another one first. See Hiding a taxonomy from your view.
What happens when I delete a taxonomy?
Deleting a taxonomy is permanent. It removes the taxonomy’s whole category structure and every product’s classification in it, and it cannot be undone. To guard against an accidental click, the confirmation dialog keeps its Delete button disabled until you type the taxonomy’s name back exactly. Deleting one taxonomy leaves every other taxonomy untouched, so each product keeps its classification in the taxonomies you keep. The built-in Cernel Taxonomy cannot be deleted; you can hide it from your view instead.
How do I remove a product's classification (unclassify it)?
You can clear a product’s category by hand from the product table, which is useful when a classification landed in the wrong place and you want to start over. Turn on the Classification column from the table’s Column settings, switch on Bulk select, and select the Classification cells for the products you want to reset. Then press Delete (or open Bulk edit values and choose Clear) to empty the category. The products keep all their other values and are simply no longer classified, so you can re-run classification, or set a category by hand, whenever you’re ready. See Moving products to a different category in bulk.